
There is truly nothing on earth that smells better than an apple pie baking in the oven. It just wraps you up in a hug, right? When I was small, standing on that wobbly stool in my mom’s kitchen, I learned that an apple pie wasn’t just dessert; it was the main event. Honestly, for years, I struggled with them—mushy centers, pale crusts—I thought I just wasn’t cut out for it! But through lots of testing (and a little bit of help from folks who perfected the art, like the wonderful bakers I follow online, such as over at The Food Charlatan), I cracked the code. If you’ve ever messed up a cake recipe, you know how annoying that is, but don’t worry, this recipe is much more forgiving, just like my favorite apple dapple cake. Trust me when I tell you this homemade apple pie recipe gives you that impossibly flaky pie crust and a filling that sets up perfectly every single time. This is it—the best one!
- Why This is the Best Homemade Apple Pie Recipe
- Gathering Ingredients for Your Classic Apple Pie
- Step-by-Step Instructions for Homemade Apple Pie
- Tips for the Most Reliable Apple Pie
- Variations on the Classic Apple Pie
- Serving Suggestions for Your Perfect Apple Pie
- Storage and Reheating for Leftover Apple Pie
- Frequently Asked Questions About Making Apple Pie
- Nutrition Estimate for This Apple Pie
- Share Your Apple Pie Creations
- Nutrition Estimate for This Apple Pie
- Share Your Apple Pie Creations
Why This is the Best Homemade Apple Pie Recipe
What separates a good apple pie from the absolute best? It’s all in the details we focus on here. This isn’t just about throwing stuff together; it’s about technique, which is what builds real cooking confidence. We focus on two big things that make this classic apple pie shine: that glorious flaky pie crust and a filling that never turns into watery applesauce. If you struggle with homemade crusts—and trust me, tons of people do!—you’ll love the tips below. For those whose crusts always underperform, check out how I get my buttermilk biscuits towering; the secret is the same!
Achieving the Perfect Flaky Pie Crust
The number one rule for a flaky crust? Keep things ice cold! I mean it. We are talking about frozen butter pieces and water that has been sitting in ice water for at least ten minutes. When those tiny, cold butter chunks hit the hot oven, the water inside turns to steam, creating those beautiful, separate layers you only dream about in a homemade crust. If your butter melts before it gets into the oven, you’re going home with a tough, mealy crust, and we don’t want that here. That contrast is the whole magic trick to that perfect texture!
Tender Apple Pie Filling Secrets
For the filling, we are committed to Granny Smith apples. They are tart enough to stand up to the sugar and, here’s the key, they don’t turn to soup when baked! We toss them evenly with a warm spice blend—cinnamon, nutmeg, allspice, the works—and a bit of flour to help thicken everything up. Once tossed, we let it sit while we roll out the dough. That resting time lets the sugar draw out a little moisture, and the flour starts its job right away. For more on getting that perfect filling that stays put, some great inspiration comes from folks over at The Kitchn, especially if you keep finding your filling too liquidy here.
Gathering Ingredients for Your Classic Apple Pie
Alright, deep breath! Before we attack that dough, we need our crew assembled. Baking shouldn’t feel like a treasure hunt halfway through, so let’s make sure everything is measured out and ready to go. It’s called mise en place—I learned that fancy term professionally, but really, it just means I’m being organized so I don’t freak out later! Having everything prepped here is what makes this process feel so smooth later on. You’ll want to grab your ingredients in these two core groups.
For the Flaky Double Crust
Remember that cold rule? Make sure these items are fridge-cold or even slightly frozen before you start!
- 2 1/2 cups all-purpose flour
- 1 teaspoon salt
- 1 cup (2 sticks) unsalted butter, very cold and cubed
- 1/2 cup ice water, plus more if needed
For the Spiced Apple Pie Filling
This is where the flavor party happens! Don’t skip the lemon juice—it keeps those beautiful apples from turning brown once they’re sliced, and it adds a tiny bit of necessary zing.
- 6 large Granny Smith apples, peeled, cored, and sliced 1/4-inch thick
- 1/2 cup granulated sugar
- 1/4 cup packed light brown sugar
- 1 teaspoon ground cinnamon
- 1/4 teaspoon ground nutmeg
- 1/8 teaspoon ground allspice
- 2 tablespoons all-purpose flour
- 1 tablespoon lemon juice
- 1 large egg, beaten with 1 teaspoon water (for egg wash)
- 1 tablespoon coarse sugar for sprinkling (optional)
P.S. If you’re looking for other buttery dough projects after this success, I highly recommend trying out my cranberry orange scones—they use similar cold-fat techniques for fantastic lift!
Step-by-Step Instructions for Homemade Apple Pie
Okay, you’ve got your ingredients ready—now let’s get down to the serious, fun part! Making a classic apple pie from scratch is totally doable, I promise. The key here is patience, especially in the first phase. If you rush the chilling, you rush the flakiness, and we want these crusts to sing! You’ll find everything flows so much easier if you just stick to the timing I’ve laid out here. If you need some inspiration for faster meals after tackling this big bake, hop over and see my list of easy weeknight dinners!
Making and Chilling the Pie Dough
First up is the foundation: the dough! You’ll start by giving that flour and salt a quick whisk in a big bowl. Then you cut in your super cold butter pieces until it looks like coarse meal with some little pea-sized butter bits still hanging around—don’t blend it smooth! That’s what makes it flaky. Now, drizzle in your ice water, tablespoon by tablespoon, mixing until it *just* barely comes together. Don’t go hog wild kneading it! Divide that shaggy dough into two disks, wrap them tight, and tell them to chill out in the fridge for a full hour. Seriously, don’t skip that hour!
Assembling the Apple Pie Filling
While that dough is getting happy in the cold, you tackle the apples. In a large bowl, gently toss those sliced Granny Smiths with the sugars, all those warm spices—cinnamon, nutmeg, allspice—plus the flour and lemon juice until everything is coated nicely. Just stir until you don’t see any dry spots of flour left. Then, just set that bowl aside. It needs that quiet time to start releasing its juices; this is step three, and it sets the stage for a perfectly set filling later on. If you need help with timing because life is busy, I sometimes follow advice from friends like those at Living on a Dime here.
Building and Baking Your Apple Pie
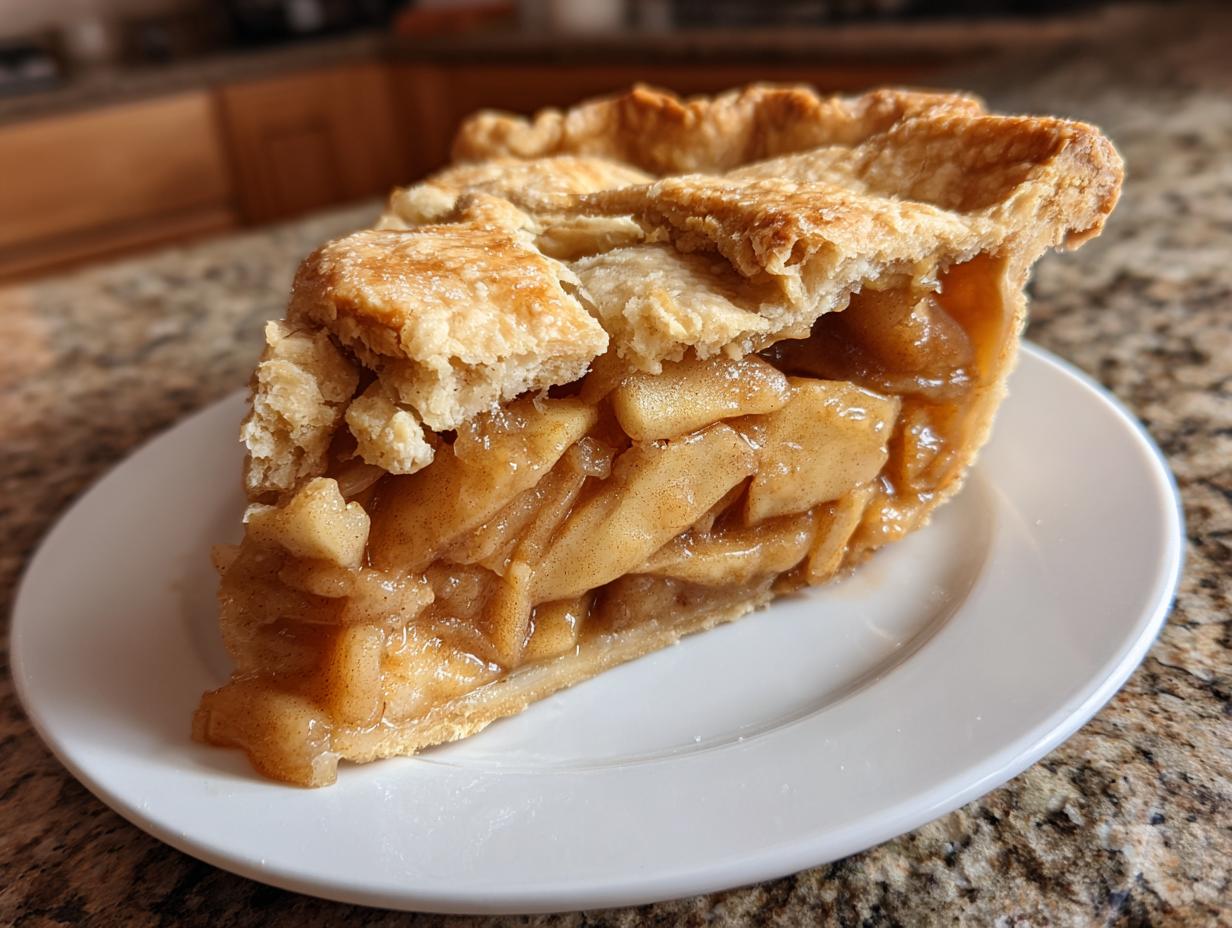
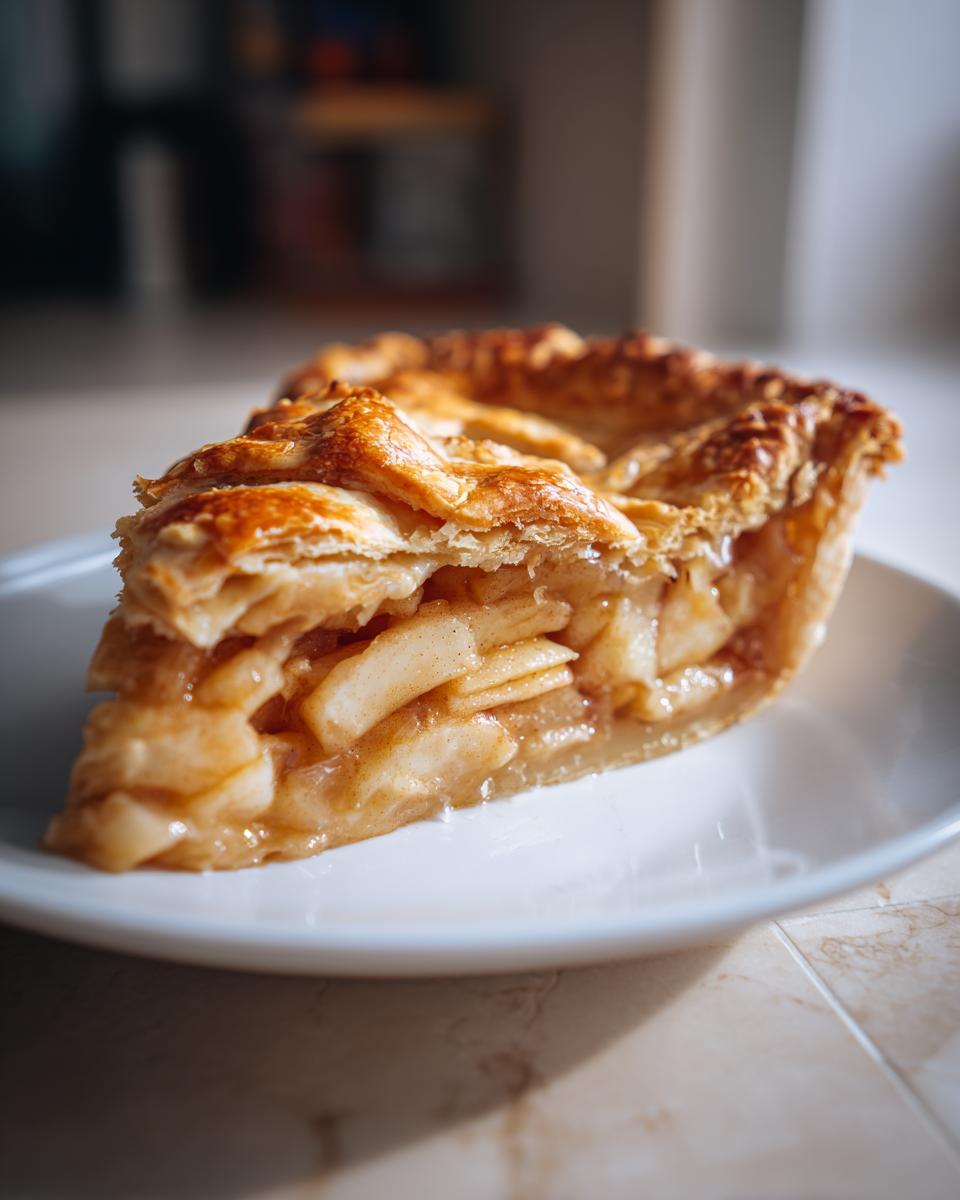
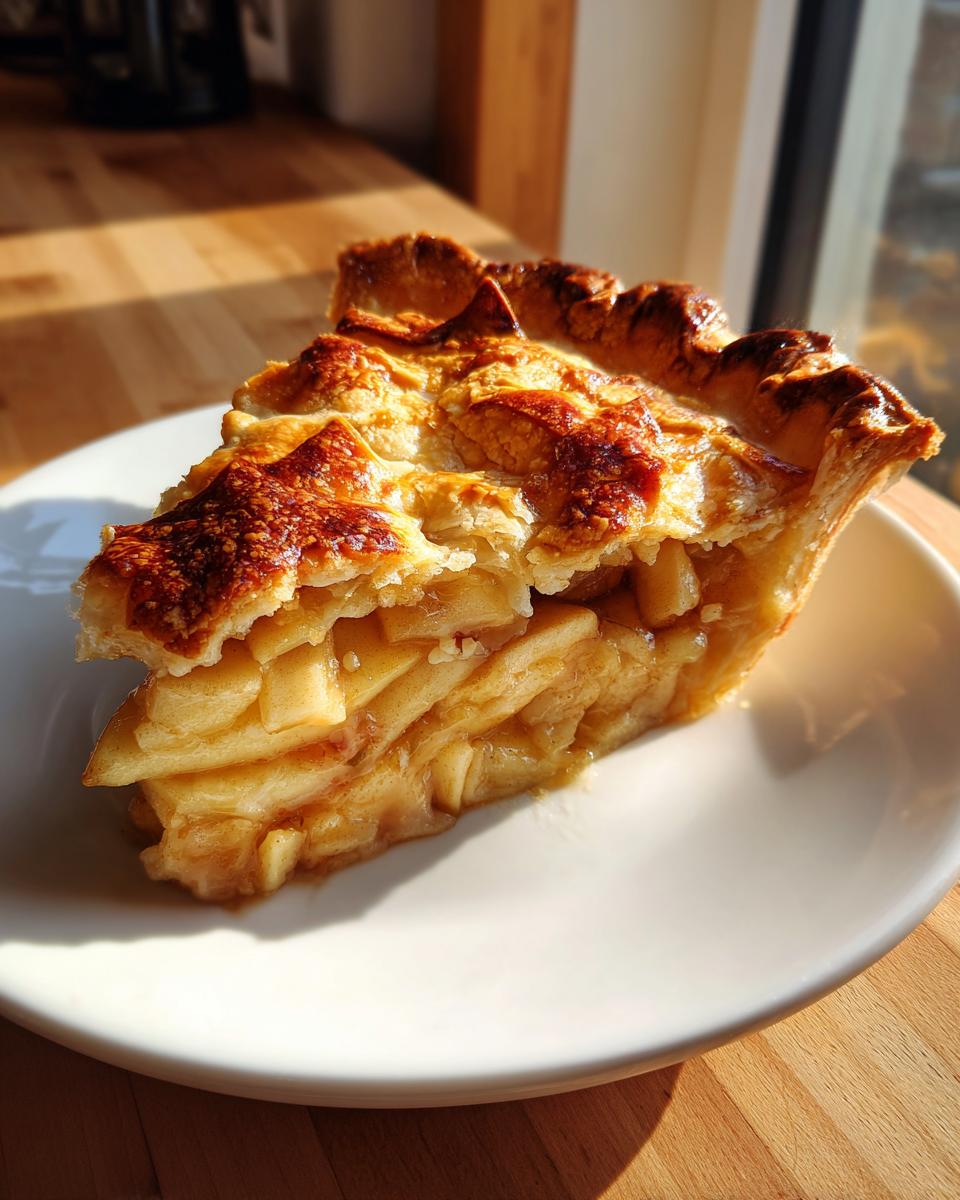
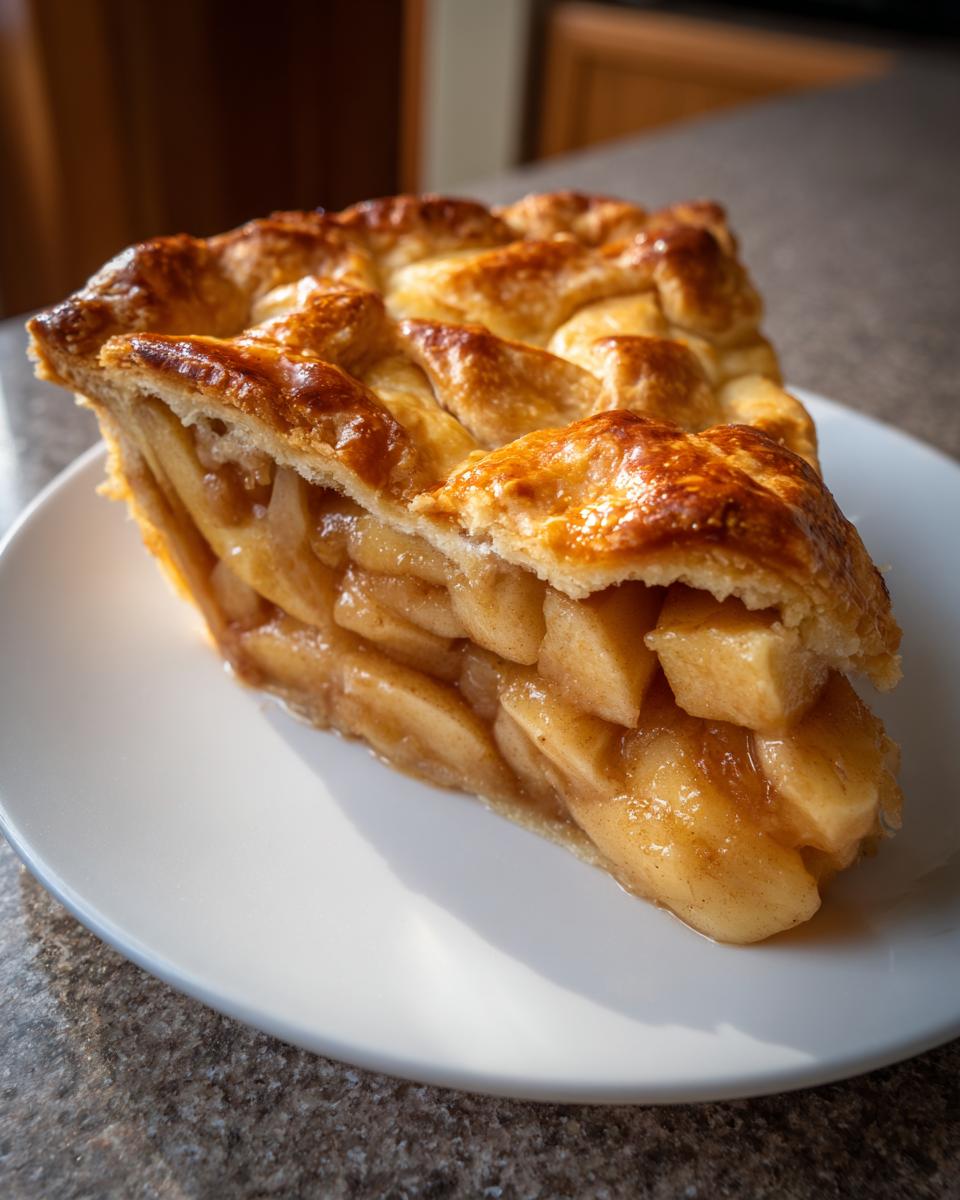
Time to roll! Preheat the oven to 425°F (220°C). Roll out one disk for the bottom crust and ease it into your 9-inch pie plate. Pour in all those glorious, spiced apples, mounding them in the middle. Roll out the top crust, lay it gently over the filling, and then you pinch those edges together! Crimp them nicely and remember to cut those steam vents—a pie needs to breathe! Brush it with the egg wash and toss on that coarse sugar for crunch. Bake it hard for 15 minutes up there at 425°F, then drop the temp down to 375°F (190°C) and bake for another 40 to 50 minutes. If the edges look dark, cover them loosely with foil. But here’s the non-negotiable finale: let that beautiful apple pie cool completely on a rack for at least three hours before you dare slice it. Patience pays off when you are waiting for that filling to set into sliceable perfection!
Tips for the Most Reliable Apple Pie
Now that you have the full instructions for making this apple pie, I want to share just a few extra nuggets of wisdom I’ve collected over the years. A reliable recipe is great, but knowing *why* you do certain things turns you from a baker into a true kitchen master. These little pointers are what take this from a great slice to the best apple pie my family ever had!
If you’re looking for something equally reliable but maybe less pie-focused, my directions for my one-pot enchilada pasta use similar principles of balancing flavor without complicating the steps.
Keeping That Crust Cold is Non-Negotiable
I can’t stress this enough, so listen up! For the absolute flakiest pie crust, everything needs to be ice cold. I mean that butter has to be rigid, and your water needs actual ice cubes floating in it. If you feel like your kitchen is too warm while you’re working, stop! Stick the bowl of your flour mixture back in the fridge for ten minutes. This stops the butter from melting into the flour, which is what gives you that tough, hard crust instead of pockets of flaky layers. It’s all about the steam pockets the cold fat creates when it hits the heat.
Why Granny Smith Apples Are My Go-To
You might be tempted to use Honeycrisp or Gala because they are so sweet, but stick with Granny Smith for this classic apple pie. Why? Texture and tartness! Granny Smiths hold their shape beautifully while baking, so you get defined slices instead of mush. Plus, their tartness cuts right through the sweetness of the sugars and spices we add, making the flavor bright and balanced. If you want to see how this works in a different context, check out Grandma Ople’s original approach to pie over at Allrecipes—she always knew which apples to use!
The Magic of Letting the Filling Rest
Remember in the instructions where I said to let the filling sit after tossing it? That’s intentional, friend! While it’s resting, the salt and sugar are starting to pull moisture from the apples. When that moisture hits the flour *before* it goes into the oven, it starts to hydrate the starch, which helps ensure your filling thickens up correctly once baked. If you skip that, you risk that runny pie situation we all try to avoid. It gives the flour a little head start so you’re guaranteed a beautiful, tender, and gorgeous slice.
Variations on the Classic Apple Pie
Now, I adore this classic apple pie—truly, it’s my reliable standard for comfort food. But sometimes, you just need a little shake-up, right? Baking is all about experimenting once you’ve mastered the basics. The search results I see are full of folks looking for something a little different, and luckily, this recipe base is super adaptable. You can take this exact same spiced apple filling and twist the topping for a whole new experience!
If you’re ever in the mood for something a bit more textural, maybe try my apple crumble pie idea next time. It’s just as cozy but swaps the top crust for that buttery, crunchy streusel topping. It’s incredibly satisfying when you get that topping golden brown!
Thinking about trying something new? Take a look over at those bakers tackling the Dutch apple pie—they have some incredible ideas for amazing crumb toppings. You can grab inspiration for a great streusel over at The Food Charlatan while you’re exploring variations. They make a beautiful one!
For those days when you want that apple pie flavor but maybe don’t want to deal with rolling out two sheets of dough, consider turning the filling into something else entirely! I highly recommend taking that spiced apple mixture and folding it into my recipe for apple brownies. It gives you all those warm cinnamon apple dessert vibes in a completely different shape. It’s a fun way to use up extra filling if you happen to make a double batch!
Serving Suggestions for Your Perfect Apple Pie
Okay, the hardest part is over! You’ve got a beautiful, golden-brown apple pie that has rested for three agonizing hours. Now, how do you serve this masterpiece? Honestly, a slice this good doesn’t need much help, but a few classic additions just take that comfort food experience to the next level, don’t you think?
First and foremost, you absolutely must try it warm with a scoop of good vanilla ice cream. I mean, the contrast between the warm, cinnamon-spiced apples and that cold, creamy vanilla is perfection—it’s non-negotiable for me! If you’re feeling extra fancy, a drizzle of homemade caramel sauce pulls everything together, kind of like how the chocolate makes my chocolate banana bread so rich.
But here’s my little Midwestern shocker for you: try a slice of sharp cheddar cheese alongside it. Seriously, don’t knock it till you try it! That salty, tangy bite of cheddar cuts through the sweetness of the filling in the most brilliant way. It’s an old fashioned apple pie pairing that just makes sense. Serve it up, dig in, and enjoy every single bite of that flaky crust!
Storage and Reheating for Leftover Apple Pie
Oh man, if you have leftovers—and sometimes I deliberately bake an extra pie just hoping I do!—you want to treat this beautiful creation gently. This isn’t like storing actual cake; the crust is involved, and we need to protect that hard-earned flakiness! We put so much work into not getting a soggy bottom, so storage matters, trust me!
For the first night, honestly, it’s fine sitting out on the counter, covered loosely with foil or a cake dome, especially if your kitchen isn’t super hot. An apple pie is pretty stable at room temperature for about 24 hours. Remember, we used a double crust, so it’s protected well.
If you need to save it longer than that—say, a few days or until the weekend—you absolutely must refrigerate it. Place the pie, uncovered at first, on the counter until it cools completely (we talked about that 3-hour cooling time being crucial, right?). Once it’s totally cool, cover the whole thing with plastic wrap or foil but make sure the wrap isn’t touching the crust too much, or you risk moisture transfer and stickiness overnight. It keeps well in the fridge for up to four days.
Now for reheating the slices! This is key for crust management. You want to bring back that buttery crispness, not steam it into a soft mess. Skip the microwave if you can! The microwave is the enemy of a crisp crust.
Instead, take your slice of apple pie and pop it onto a baking sheet. Warm it in an oven (preheated to about 350°F or 175°C) for about 10 to 15 minutes. This gentle warmth heats the apples back up and actually re-crisps the crust wonderfully. If you like really warm pie, you can try warming just the slice in the toaster oven for a few minutes too! Just watch it closely.
If you love exploring those rich flavors that come from slow baking, just like in my fudgy chocolate crinkle cookies, remember that patience in the cooling and reheating phases is just as important as patience in the mixing!
Frequently Asked Questions About Making Apple Pie
I know, I know! Baking an apple pie from scratch is a big undertaking, and sometimes little questions pop up right when you are standing there with flour on your hands. That is totally normal! I’ve been there a million times. Over the years, as I’ve taught friends and tested recipes, these are the questions that come up most often about getting that perfect classic apple pie. Let’s clear them up so you can feel totally confident!
What are the best apples for an old fashioned apple pie?
This is such an important question because the wrong apple choice is the fastest way to get that mushy center we always try to avoid! The star here has to be the Granny Smith apple. I love them because they are naturally tart, which balances out the sugar we add for that sweet apple dessert flavor. More importantly, they have a firm texture, so even after 60 minutes in the oven, they hold their shape! If you want to mix it up slightly for a slightly sweeter profile, you can combine them with a Honeycrisp, but make sure Granny Smith is at least half your apple blend. It really makes the difference for an old fashioned apple pie.
Can I make this apple pie recipe with a store-bought crust?
Listen, if you are in a pinch, yes, absolutely! Life happens, and sometimes you just need that comfort food dessert without the extra hour of dough work. You can certainly use a good quality, refrigerated store-bought crust for both the bottom and the top or use it for just the bottom and do a Dutch apple pie crumb topping instead. However, if you are aiming for what I call “the best apple pie ever,” you need that from-scratch crust. The homemade version is what gives you those incredible flaky layers that simply beat anything pre-made. So, yes, it’s *easy*, but it won’t be *the best* unless you make the crust yourself!
Why is my homemade apple pie filling runny?
Oh, the dreaded runny filling! This usually comes down to two things, my friend. First, did you measure your thickener correctly? We use flour here, and if you under-measure or forget to mix it in really well with the sugar and spices—which is easy to do when you’re tossing apples—it won’t activate properly. But honestly, the biggest culprit is usually impatience! You *must* let that whole apple pie cool for a full three hours. That time allows the juices and the starch to set up firmly. If you slice it hot, it just spills out everywhere! I always rely on advice from folks like The Kitchn on thickening agents when I experiment, so I highly recommend checking their deep-dive on getting a good set here.
If you’re looking for other simple recipes to master, try my creamy mango sticky rice next—it teaches you patience with setting too!
Nutrition Estimate for This Apple Pie
I always get asked this, especially since I have a background in nutrition! I want to be super clear though: because this classic apple pie recipe relies on lots of butter for that flaky crust and high sugar content from the filling, it definitely falls into the “treat yourself” category. These numbers are just estimates based on the ingredients list provided, assuming you get 8 even slices. Make sure you account for whatever fantastic topping you choose!
- Serving Size: 1 slice
- Calories: 450
- Sugar: 35g
- Sodium: 300mg
- Fat: 25g
- Saturated Fat: 15g
- Unsaturated Fat: 10g
- Trans Fat: 0g
- Carbohydrates: 55g
- Fiber: 3g
- Protein: 5g
- Cholesterol: 60mg
It’s all about enjoying those warm, comforting moments, and knowing the ingredients you’re using is the first step to smart indulgence! If you’re looking to balance out your diet later in the week, take a peek at my guide to healthy lunch ideas.
Share Your Apple Pie Creations
Baking should always be a shared experience! You’ve taken the time, you’ve probably got flour dusting your counters, and I cannot wait to hear all about your results. Did that crust live up to the hype? Did your kitchen smell like heaven while it was baking? Please, please, leave a comment below and tell me how it went. Did you make any little tweaks on your own? I love hearing how you make these recipes your own!
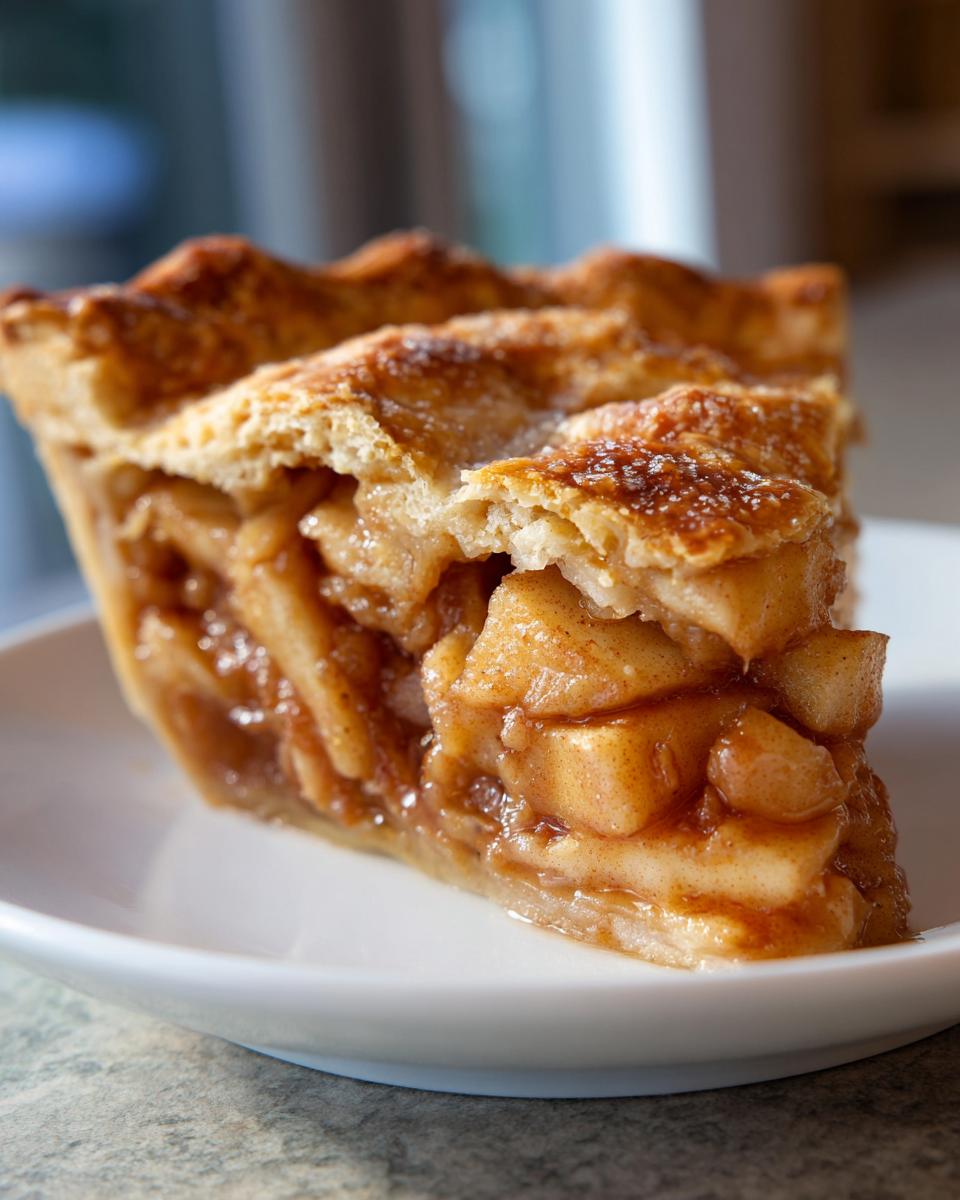
If you get a gorgeous photo of your finished apple pie—especially that perfect slice showing off the filling—I’d be thrilled if you tagged me or sent it my way through my contact page. Happy baking, friend. You just made something truly wonderful for someone you love!
Nutrition Estimate for This Apple Pie
I always get asked this, especially since I have a background in nutrition! I want to be super clear though: because this classic apple pie recipe relies on lots of butter for that flaky crust and high sugar content from the filling, it definitely falls into the “treat yourself” category. These numbers are just estimates based on the ingredients list provided, assuming you get 8 even slices. Make sure you account for whatever fantastic topping you choose!
- Serving Size: 1 slice
- Calories: 450
- Sugar: 35g
- Sodium: 300mg
- Fat: 25g
- Saturated Fat: 15g
- Unsaturated Fat: 10g
- Trans Fat: 0g
- Carbohydrates: 55g
- Fiber: 3g
- Protein: 5g
- Cholesterol: 60mg
It’s all about enjoying those warm, comforting moments, and knowing the ingredients you’re using is the first step to smart indulgence! If you’re looking to balance out your diet later in the week, take a peek at my guide to healthy lunch ideas.
Share Your Apple Pie Creations
Baking should always be a shared experience! You’ve taken the time, you’ve probably got flour dusting your counters, and I cannot wait to hear all about your results. Did that crust live up to the hype? Did your kitchen smell like heaven while it was baking? Please, please, leave a comment below and tell me how it went. Did you make any little tweaks on your own? I love hearing how you make these recipes your own!
If you get a gorgeous photo of your finished apple pie—especially that perfect slice showing off the filling—I’d be thrilled if you tagged me or sent it my way through my contact page. Happy baking, friend. You just made something truly wonderful for someone you love!
PrintThe Best Homemade Apple Pie Recipe with Flaky Double Crust

Follow this reliable recipe to make the best homemade apple pie featuring a perfectly flaky double crust and a tender, spiced apple filling. This classic recipe delivers comfort in every slice.
- Prep Time: 45 min
- Cook Time: 60 min
- Total Time: 1 hour 45 min
- Yield: 8 servings 1x
- Category: Dessert
- Method: Baking
- Cuisine: American
- Diet: Vegetarian
Ingredients
- 2 1/2 cups all-purpose flour
- 1 teaspoon salt
- 1 cup (2 sticks) unsalted butter, very cold and cubed
- 1/2 cup ice water, plus more if needed
- 6 large Granny Smith apples, peeled, cored, and sliced 1/4-inch thick
- 1/2 cup granulated sugar
- 1/4 cup packed light brown sugar
- 1 teaspoon ground cinnamon
- 1/4 teaspoon ground nutmeg
- 1/8 teaspoon ground allspice
- 2 tablespoons all-purpose flour
- 1 tablespoon lemon juice
- 1 large egg, beaten with 1 teaspoon water (for egg wash)
- 1 tablespoon coarse sugar for sprinkling (optional)
Instructions
- Prepare the pie crust: In a large bowl, whisk together the 2 1/2 cups flour and 1 teaspoon salt. Cut in the cold butter using a pastry blender or your fingers until the mixture resembles coarse crumbs with some pea-sized pieces of butter remaining.
- Gradually add the ice water, one tablespoon at a time, mixing until the dough just comes together. Do not overmix. Divide the dough in half, form each half into a disk, wrap in plastic wrap, and chill for at least 1 hour.
- Prepare the apple pie filling: In a large bowl, gently toss the sliced apples with the granulated sugar, brown sugar, cinnamon, nutmeg, allspice, 2 tablespoons flour, and lemon juice until the apples are evenly coated. Set aside while you roll out the bottom crust.
- Preheat your oven to 425°F (220°C).
- Roll out one disk of dough on a lightly floured surface into a 12-inch circle. Carefully transfer the dough to a 9-inch pie plate. Trim the edges, leaving a 1-inch overhang.
- Pour the apple filling into the bottom crust, mounding the apples slightly in the center.
- Roll out the second disk of dough for the top crust. Place it over the filling. Trim the top crust overhang to match the bottom. Crimp the edges to seal the top and bottom crusts together. Cut several slits in the top crust to allow steam to escape.
- Brush the top crust lightly with the egg wash and sprinkle with coarse sugar, if using.
- Bake for 15 minutes at 425°F (220°C). Then, reduce the oven temperature to 375°F (190°C) and continue baking for 40 to 50 minutes more, or until the crust is golden brown and the filling is bubbly. If the edges brown too quickly, cover them loosely with foil.
- Cool the apple pie completely on a wire rack for at least 3 hours before slicing. This allows the filling to set properly.
Notes
- For the flakiest pie crust, keep all your butter and water extremely cold.
- If you prefer a Dutch Apple Pie, skip the top crust and use a streusel topping instead.
- Granny Smith apples provide the best tartness and hold their shape well during baking.
Nutrition
- Serving Size: 1 slice
- Calories: 450
- Sugar: 35g
- Sodium: 300mg
- Fat: 25g
- Saturated Fat: 15g
- Unsaturated Fat: 10g
- Trans Fat: 0g
- Carbohydrates: 55g
- Fiber: 3g
- Protein: 5g
- Cholesterol: 60mg