
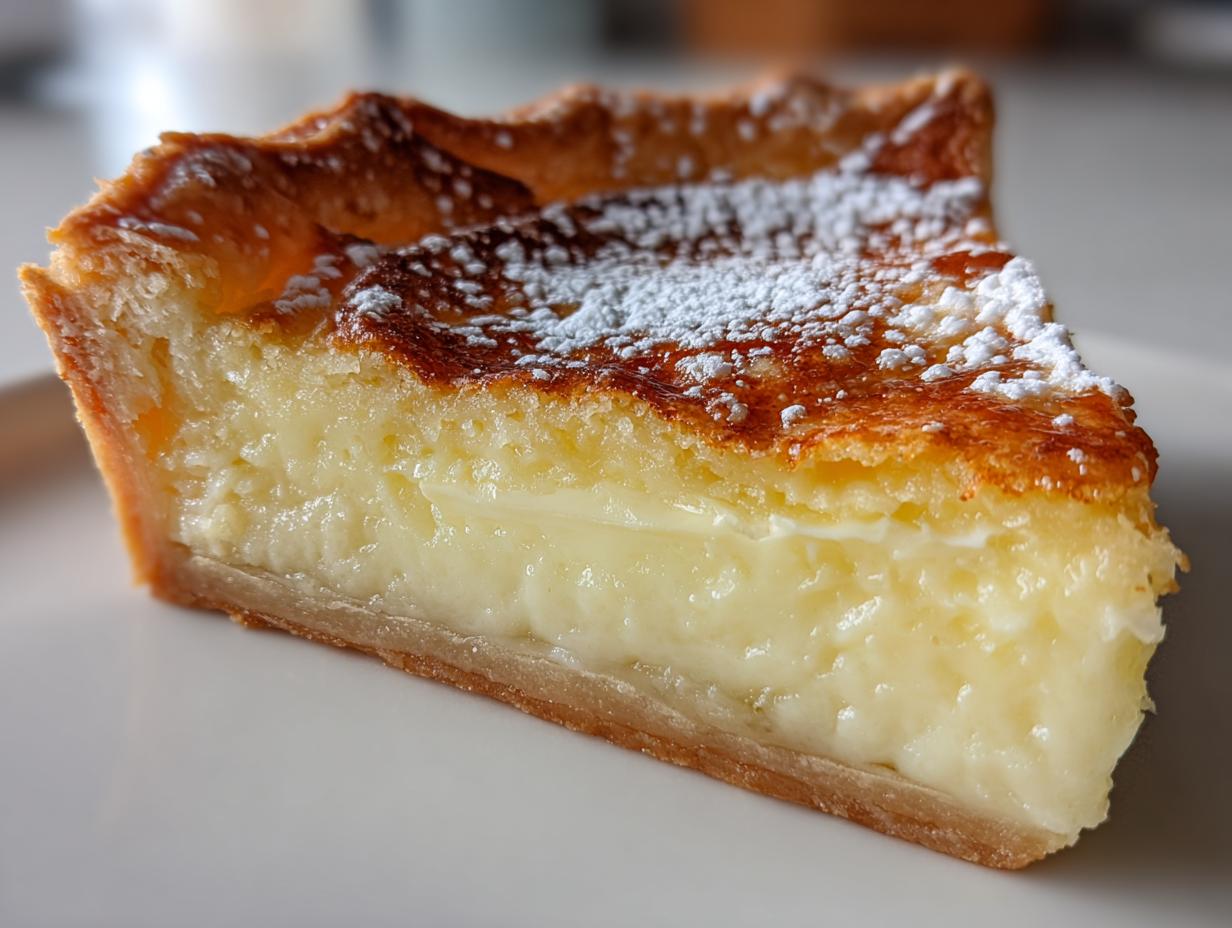
There’s something truly special about Southern baking traditions, and if you ask me what epitomizes Southern Comfort Food, it has to be a perfect slice of buttermilk pie. Forget all those fancy layered constructions; this is where real flavor lives! When I was first learning in the kitchen, this was the recipe I kept coming back to because it proves that simple, honest ingredients, handled correctly, make the best desserts. This recipe is my definitive version—easy to assemble, deeply flavorful, and absolutely authentic to that classic, tangy Southern profile everyone craves. If you loved my recipe for tall, flaky buttermilk biscuits, you are going to adore this pie. Trust me when I say this will be your new go-to for holidays or any time you just need a taste of home.
- Why This Old Fashioned Buttermilk Pie Recipe Works (E-E-A-T)
- Ingredients for the Best Buttermilk Pie
- Step-by-Step Instructions for Classic Buttermilk Pie
- Tips for a No Fail Buttermilk Pie
- Serving Suggestions for Your Tangy Dessert
- Storage and Make-Ahead Instructions for Buttermilk Pie
- Variations on the Classic Buttermilk Pie
- Frequently Asked Questions About Buttermilk Pie
- Nutrition Estimate for This Buttermilk Dessert
Why This Old Fashioned Buttermilk Pie Recipe Works (E-E-A-T)
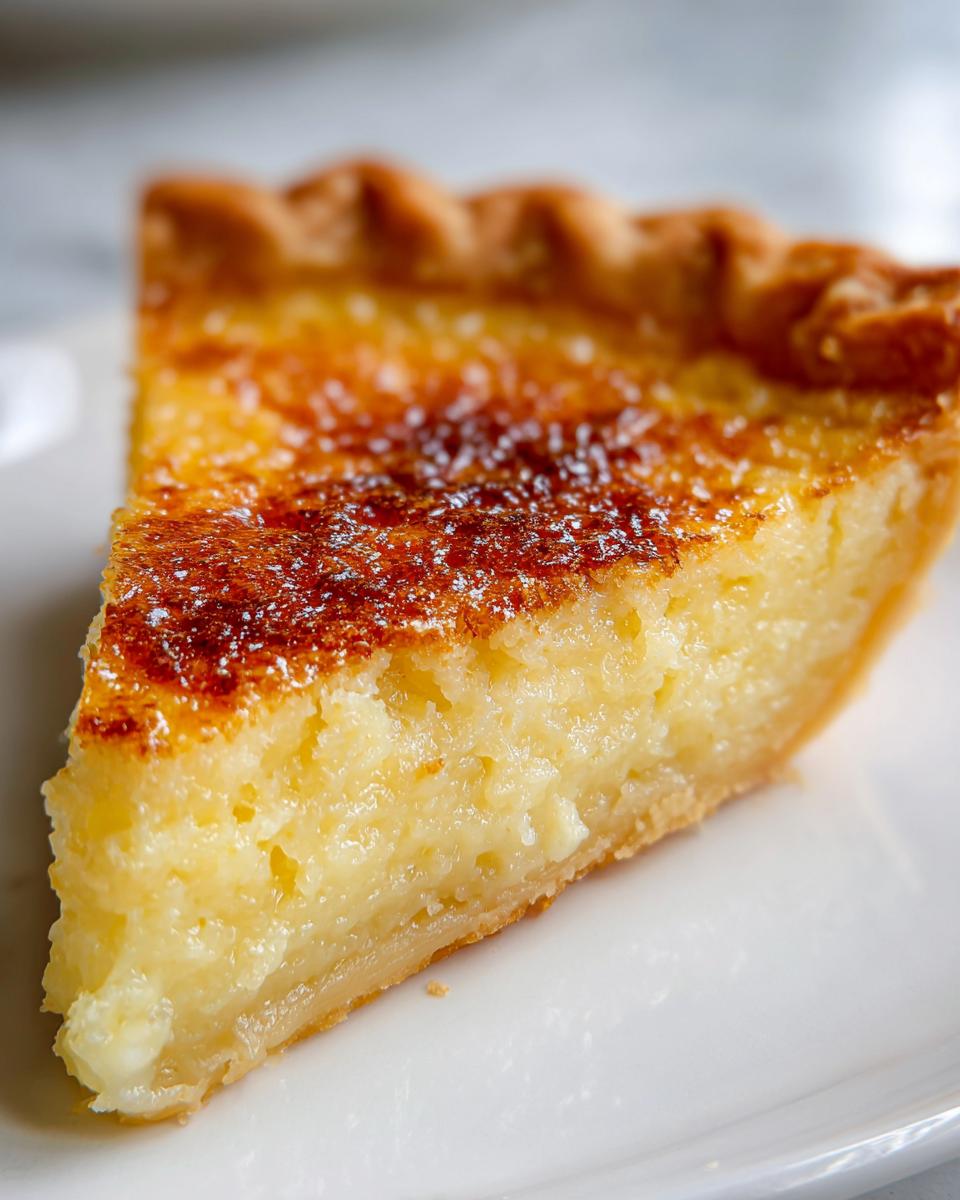
Listen, I know custard pies can be intimidating. You worry about graininess or that flop in the middle, which is why I spent endless hours perfecting this recipe back when I was working in the professional test kitchen. This isn’t just another sweet pie; it’s that perfect marriage of sweet richness and bright, tangy dessert flavor that Southern cooking nails. My background ensures that what you’re getting is a truly No Fail Buttermilk Pie, time and time again. It’s designed to be an Easy Custard Pie that always delivers that melt-in-your-mouth velvety finish you want. I always tell people, if you want to know what a true Southern Buttermilk Pie Recipe should taste like, this is it. When I develop these recipes, I make sure they are foolproof; just like my creamy garlic aioli, the reliability is key! You can see why heritage recipes like the one from Melissa’s Southern Style Kitchen are so beloved—it’s all about honoring that traditional balance!
Achieving the Perfect Buttermilk Custard Filling
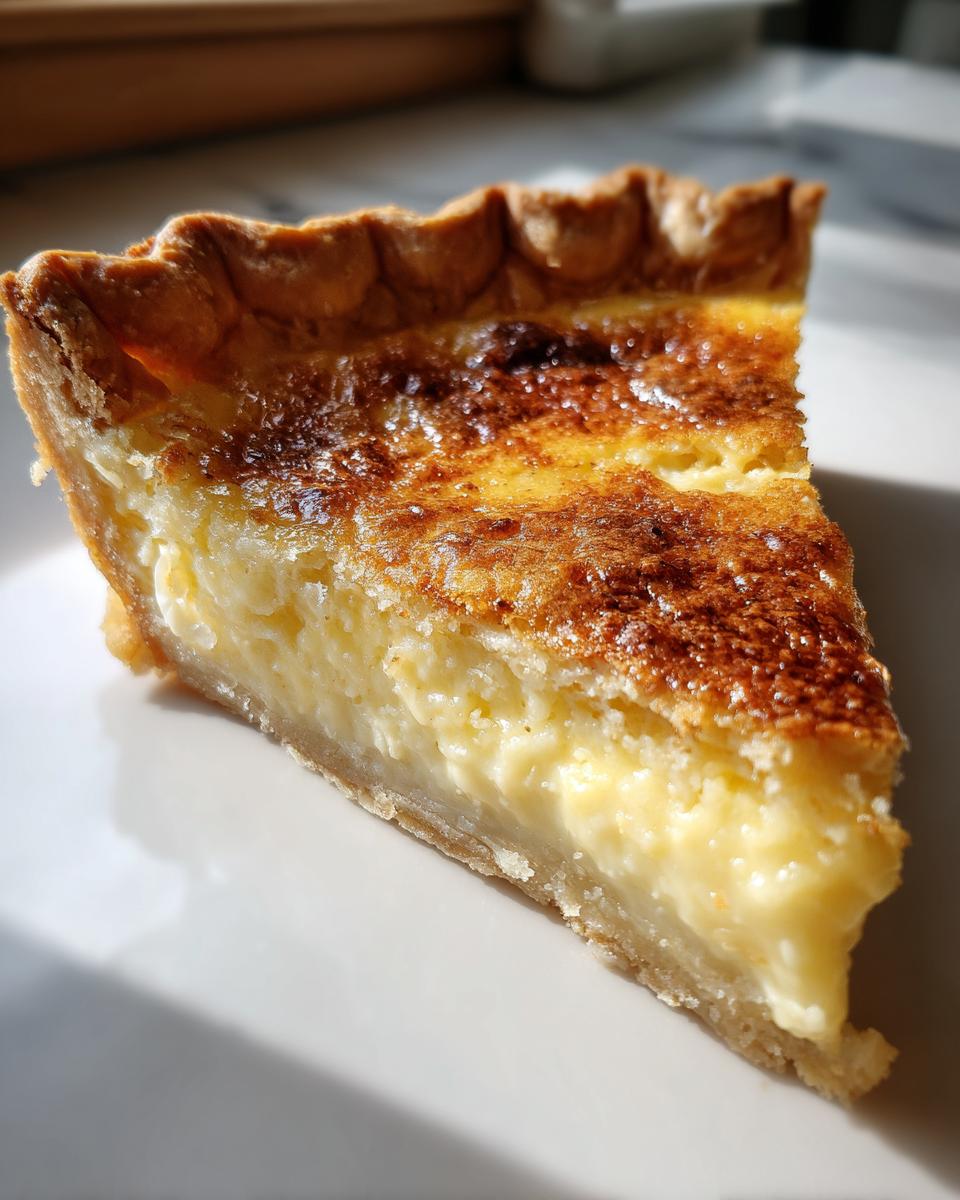
The secret sauce to that luxurious texture isn’t just the buttermilk; it’s the sneaky little bit of flour we use. That flour, combined with the sugar, acts as our gentle setting agent. It keeps the eggs working exactly as we want them to, binding everything together without curdling or turning grainy. It means your buttermilk custard filling sets up beautifully—think smooth silk, not lumpy pudding. The lemon juice brightens everything up, cutting through the richness just enough so you can truly appreciate that sweet-tangy flavor we are hunting for. It’s simple science, really, but it makes all the difference!
Ingredients for the Best Buttermilk Pie
The magic of this pie is that it’s practically made from things you already have on hand! That’s what makes this one of my favorite pantry staple desserts—no last-minute grocery store panic required for this Southern Buttermilk Pie Recipe. We are aiming for rich, classic flavor using simple tools. Here is exactly what you’ll need to gather for that gorgeous, tangy custard!
- 1 (9-inch) unbaked flaky pie crust (we’ll talk about this below!)
- 1 1/2 cups granulated sugar
- 3 tablespoons all-purpose flour
- 1/4 teaspoon salt
- 1/4 teaspoon ground nutmeg
- 3 large eggs, lightly beaten
- 1 cup buttermilk
- 1 teaspoon vanilla extract
- 2 tablespoons unsalted butter, melted
- 1 teaspoon fresh lemon juice
Flaky Pie Crust Considerations
The recipe calls for an unbaked crust, and honestly, sometimes life is too short, so using a good quality store-bought shell is perfectly acceptable for this easy baking for beginners recipe! But if you have time, there is nothing better than a homemade crust. If you want to tackle a great one from scratch, make sure you check out my tips for making the perfect crust foundation. A truly outstanding Homemade Pie Recipe starts with a butter crust that sheds those perfect flakes!
Step-by-Step Instructions for Classic Buttermilk Pie
Okay, now that you have your ingredients lined up, let’s get this pie in the oven! This is where the magic of buttermilk pie really sets in, and I promise, it’s so straightforward. First things first: get that oven warmed up! We need a nice steady heat starting at 350 degrees Fahrenheit. Go ahead and place your unbaked flaky pie crust right into your 9-inch pie plate. No need to pre-bake this one, which makes it perfect for simple baking for beginners.
Mixing the Buttermilk Pie Filling
We follow a classic order here, which makes sure we don’t get any lumps. In one medium bowl, you’ll whisk together all your dry stuff—that’s the sugar, flour, salt, and the nutmeg. Whisk it really well so everything is evenly distributed. In a separate bowl, mix up your wet ingredients: eggs, buttermilk, vanilla, melted butter, and that little splash of lemon juice. It should look uniform and happy!
Now, here’s the most important part for beginners: don’t just dump the dry stuff into the wet all at once! We add the dry mixture gradually to the wet. Mix it just until everything disappears. I mean it—just until you don’t see flour streaks anymore. Overmixing develops the gluten in the flour, and we want this filling to be tender and creamy, not chewy! This careful mixing ensures a smooth consistency, unlike what happens when you overmix dough.
Baking and Setting the Southern Buttermilk Pie
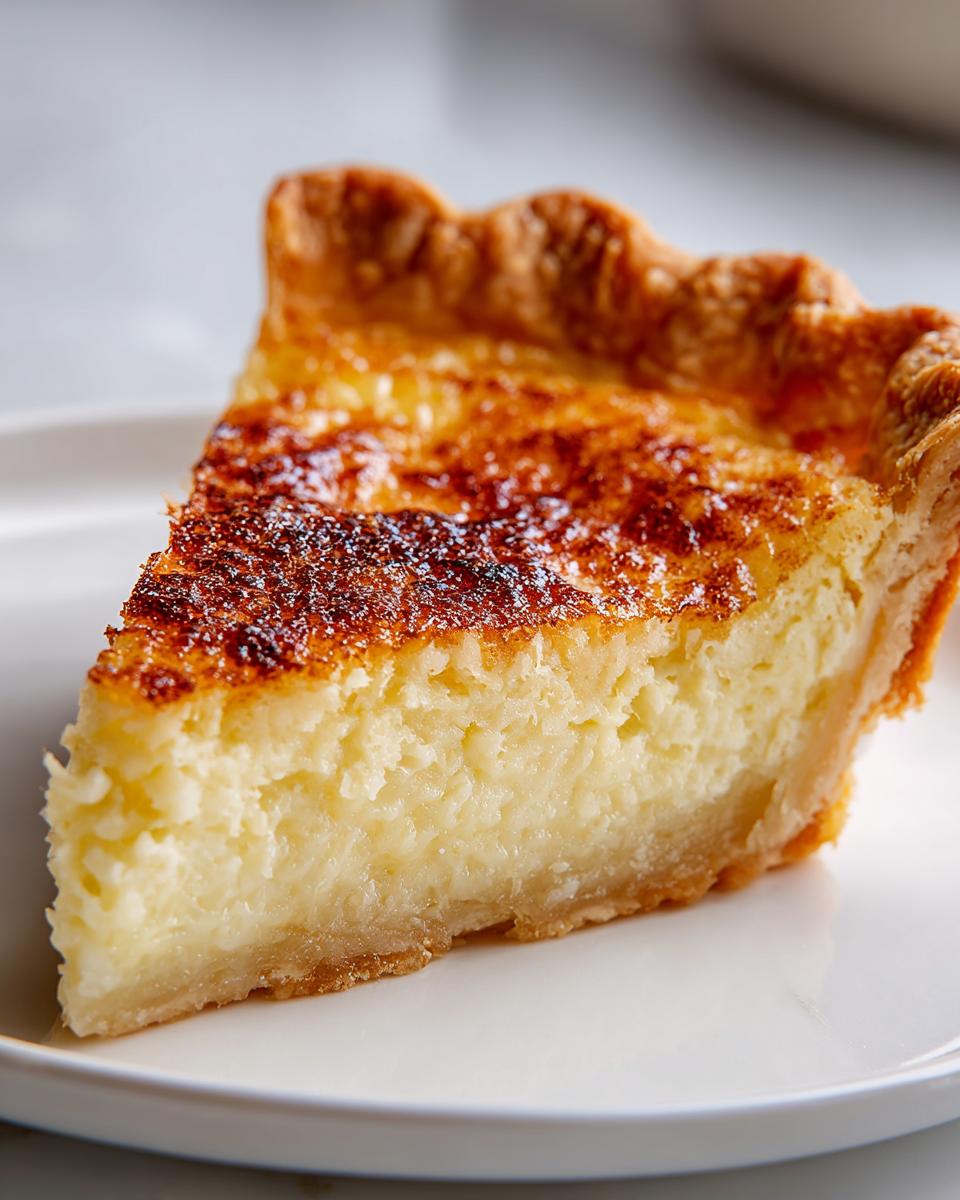
Once your batter is smooth, pour it right into that waiting pie crust. Pop it into your preheated 350°F oven. It usually takes about 40 to 50 minutes to bake. You’re looking for a beautiful golden-brown top—that’s a great visual cue! But to know it’s truly done, give the pie plate a gentle nudge. If the edges look set solid but the very center still gives you a tiny little jiggle when you move it, you’re done! It should look almost like Jell-O right there, but not liquidy. I keep one of my favorite pie blogs bookmarked in case of oven variations, like the one you can find over at The Pioneer Woman.
Here’s the tough part: you have to let it cool completely on a wire rack. This resting time, sometimes for several hours, is non-negotiable for setting that gorgeous buttermilk custard filling. Seriously, do not cut it warm, or you’ll have soup! This resting stage guarantees you a perfect piece of Southern Buttermilk Pie Recipe goodness when it’s finally time to enjoy it. If you want to peek ahead at some easy kitchen inspiration while you wait, check out my hamburger helper recipe!
Tips for a No Fail Buttermilk Pie
I hate waste, and I hate wasting good baking time even more, so let’s talk about how to guarantee success when making this No Fail Buttermilk Pie. Even the easiest custard pies can be tricky if you rush the process or ignore those little signals the oven sends you. Since I want you to experience that pure, **tangy dessert** bliss without any kitchen drama, here are the crucial things I always double-check before I even start mixing.
First off, let’s talk temperature and time. The recipe calls for 40 to 50 minutes at 350°F, but ovens argue with each other constantly. If you’re nervous about the set—and I get it, setting custard is scary—bake it low and slow. If you pull it out and it’s still too jiggly past the 50-minute mark, you can absolutely drop the temperature down to 325°F and let it bake longer, maybe another 10 to 15 minutes. This slower method gently sets the eggs and prevents that dry, cracking top, which is always a sad sight on a beautiful classic buttermilk pie.
Secondly, and this is straight from the ‘Notes’ section: don’t be shy with your flavorings. The recipe has nutmeg, but if you want to lean into that rich, warm comfort food vibe, try swapping it out for cinnamon for a slightly different aroma—it plays so well against the tang. You can check out my thoughts on easy weeknight dinners while you wait for the pie to cool, but for now, focus on the nutmeg!
My absolute favorite trick, though, is leveraging a little acid. That teaspoon of lemon juice isn’t just for sparkle; it helps stabilize everything. If you’re worried about curdling or if your buttermilk seems a tiny bit off, that acid is your failsafe insurance policy. It guarantees that beautiful, smooth consistency that makes this an authentic Southern comfort food favorite. If you want more tips on adapting simple pies, I found some great advice over here that talks through common issues!
Serving Suggestions for Your Tangy Dessert
Now that you’ve successfully navigated the baking process and waited—patiently, I hope—for that custard to set up perfectly, it’s time for the fun part: serving! This buttermilk pie is fantastic because it’s not fussy, but presentation can still elevate it, especially when you’re serving it as a beautiful Holiday Pie Idea.
The number one rule I stick to, just like my grandmother always did when baking, is serving this pie chilled. Remember that long cooling period? It’s crucial for the texture. When served cold, that custard firms up just right, giving you a clean slice and emphasizing that wonderful sweet and tangy pie flavor. A room-temperature slice is fine, but chilled is truly the ultimate experience for this specific tangy dessert.

What goes on top? Oh, the possibilities! Because the **buttermilk pie** itself is rich and slightly caramelized on top, you don’t want to overpower it. A simple, light topping works best. My default choice is a big dollop of freshly whipped cream. If you want to make your own stable homemade whipped cream or a lovely buttercream frosting for a more decadent serving (I have a great vanilla buttercream recipe!), that’s wonderful, too.
If you aren’t using a topping, never underestimate the classic approach! A light dusting of powdered sugar across the top before serving is elegant and simple. Alternatively, grating a tiny bit of fresh nutmeg or even a sprinkle of cinnamon right before you slice it adds such a lovely aromatic finish. It makes the pie smell absolutely incredible when you bring it to the table for Thanksgiving or any big family dinner. Honestly, serving this pie is the easiest way to feel like a Southern baking champion!
Storage and Make-Ahead Instructions for Buttermilk Pie
Planning ahead is my favorite part of hosting, especially during the holidays when the oven is booked solid from morning until night! The great news about this buttermilk pie is that it loves being made ahead of time because it *needs* that rest period to set up properly. That’s perfect for anyone craving weekend baking treats without the last-minute rush.
You absolutely must let the pie cool completely on the counter first—that’s step one, and it usually takes a couple of hours. Once it’s cooled down to room temperature, cover it loosely with plastic wrap or even foil, but make sure it’s not touching the beautiful golden top of the pie itself. Then, pop it into the refrigerator. It needs that chill time to firm up that custard beautifully before slicing. I always aim to bake mine the day before I plan to serve it. The recipe calls for chilling for at least 2 hours before slicing, but frankly, overnight is where this pie truly shines. It lasts wonderfully in the fridge for about three to four days, still tasting fresh and tangy!
It’s a lovely secret weapon knowing you have such a fantastic dessert tucked away in the fridge! If you manage to still have leftovers after the gathering, you can safely store them away. If you’re looking ahead for other make-ahead ideas that require chilling, you have to check out my recipe for easy creamy mango sticky rice—that one needs the time to chill too, and it’s always a huge hit!
Variations on the Classic Buttermilk Pie
While this Old Fashioned Pie recipe stands perfectly on its own as the pinnacle of Traditional Southern Baking, I know some of you out there like to play with tradition once you’ve mastered the core recipe! Once you nail this classic, creamy, tangy base, it’s incredibly easy to pivot into some other incredible flavor profiles. Think of this recipe as your launchpad for amazing Buttermilk Dessert creations.
If you look at what people search for, you see a lot of love for the brighter, zestier versions. Adding a little extra punch of citrus is so easy. For a beautiful Lemon Buttermilk Pie, you just need to bump up that lemon juice to about two teaspoons and maybe add some fresh lemon zest right into the batter when you mix it. That little adjustment makes it sing!
Now, chocolate lovers, listen up! You can certainly create a decadent Chocolate Buttermilk Pie, though it involves a slight structural change. You’ll still use the same ratios of eggs, sugar, and buttermilk, but before you mix the dry ingredients into the wet, you need to whisk in about a quarter cup of good quality unsweetened cocoa powder with your flour and sugar. It makes the custard darker, richer, and you’ll want to skip the nutmeg entirely here. If you want to see a great example of how chocolate works beautifully, check out this rich recipe from Baking Sense! It proves this base can handle a serious flavor upgrade.
And what about nuts? Sometimes I get requests for a Buttermilk Pecan Pie hybrid. That’s much simpler! Take the finished, smooth batter from our main recipe, and gently fold in about a cup of chopped pecans right before pouring it into the crust. You won’t need to change the baking time much, but this gives you that satisfying crunch alongside creamy custard. Remember, mastering the original lets you experiment safely! If you’re looking for another moist baked good to try next, my moist chocolate banana bread is fantastic!
Frequently Asked Questions About Buttermilk Pie
I know recipes can sometimes leave you scratching your head when you run into a snag, especially with delicate custard pies! That’s why I want to make sure you feel totally confident tackling this Classic Buttermilk Pie. Having worked in test kitchens, I’ve seen every possible way things can go slightly sideways, so let’s talk through the common issues for this beautiful Southern Buttermilk Pie Recipe.
Can I substitute regular milk for buttermilk in this buttermilk pie recipe?
Oh, I get this question all the time! And listen, while I love showing off how adaptable we can be, for this specific pie, the answer is a strong, well-meaning ‘no’ if you want that authentic flavor. Buttermilk isn’t just about the fat content; it’s the acidity. That acid is what reacts with the eggs and flour to give us that characteristic tang and structure in the buttermilk custard filling. If you truly have zero buttermilk, you can fake it! Take regular milk—whole milk is best—and stir in about a tablespoon of white vinegar or lemon juice. Let that sit for five minutes until it looks slightly curdled. That’s your makeshift buttermilk! It works in a pinch for a traditional Southern baking recipe, but it won’t have the exact depth of flavor as the real stuff.
Why is my buttermilk pie filling runny?
This is the number one frustration for anyone making an Easy Custard Pie! Don’t panic; 99% of the time, it’s impatience! The main reason for a runny filling is *not* cooling long enough. That custard keeps setting up outside the oven for a good two or three hours. If you cut into that pie before it’s completely cooled down, it will absolutely weep onto your plate! Make sure you let it cool at room temperature until it’s just warm, and *then* refrigerate it for at least two hours before slicing. If you think you baked it long enough but it’s still liquidy, it probably just needed five or ten more minutes in the oven. Remember, we are looking for the barest wiggle in the very center when you take it out.
If you have any other burning questions about technique or substitutions, please don’t hesitate to reach out through my contact page!
Nutrition Estimate for This Buttermilk Dessert
I always try to provide as much information as possible for you home cooks because understanding what goes into your food matters, even when it’s a comforting classic like this buttermilk pie. Since this recipe uses a standard 9-inch unbaked pastry crust combined with the filling ingredients we detailed, here is a general estimate for one slice. Remember, I studied nutrition, but this breakdown is just a helpful guide!
These numbers will change slightly depending on exactly which brand of flour or what size of eggs you use. If you substitute a flaky pastry crust for a graham cracker crust, for example, the numbers shift again. Consider this your baseline for enjoying a wonderful Buttermilk Dessert!
- Serving Size: 1 slice
- Calories: 350
- Sugar: 35g
- Sodium: 250mg
- Fat: 18g
- Protein: 5g
See? Even as a rich dessert, it’s manageable when portioned out for your guests! If you’re looking for things that are a little lighter on the sugar, swing by my healthy lunch ideas post, but don’t forget to save this pie recipe for the weekend. You deserve it!
PrintClassic Old-Fashioned Southern Buttermilk Pie

Make this classic Southern Buttermilk Pie for a comforting, traditional dessert. The filling is creamy, velvety, and perfectly tangy, encased in a flaky crust. This recipe uses simple pantry staples and is easy for any home cook.
- Prep Time: 15 min
- Cook Time: 50 min
- Total Time: 1 hr 5 min
- Yield: 8 servings 1x
- Category: Dessert
- Method: Baking
- Cuisine: American
- Diet: Vegetarian
Ingredients
- 1 (9-inch) unbaked flaky pie crust
- 1 1/2 cups granulated sugar
- 3 tablespoons all-purpose flour
- 1/4 teaspoon salt
- 1/4 teaspoon ground nutmeg
- 3 large eggs, lightly beaten
- 1 cup buttermilk
- 1 teaspoon vanilla extract
- 2 tablespoons unsalted butter, melted
- 1 teaspoon fresh lemon juice
Instructions
- Preheat your oven to 350 degrees Fahrenheit. Place your unbaked pie crust into a 9-inch pie plate.
- In a medium bowl, whisk together the sugar, flour, salt, and nutmeg until combined.
- In a separate bowl, whisk the lightly beaten eggs, buttermilk, vanilla extract, melted butter, and lemon juice until smooth.
- Gradually add the dry ingredients to the wet ingredients, mixing until the batter is just combined and smooth. Do not overmix.
- Pour the buttermilk filling into the unbaked pie crust.
- Bake for 40 to 50 minutes. The center should be mostly set but still have a slight jiggle when gently moved. The top should be golden brown.
- Remove the pie from the oven and let it cool completely on a wire rack. This allows the custard to fully set.
- Chill the pie in the refrigerator for at least 2 hours before slicing and serving.
Notes
- For a richer flavor, you can substitute 1/4 teaspoon of cinnamon for the nutmeg.
- If you prefer a slightly firmer set, you can bake the pie at 325 degrees Fahrenheit for 55 to 65 minutes.
- Serve this tangy dessert chilled, often with a dusting of powdered sugar or a dollop of whipped cream.
Nutrition
- Serving Size: 1 slice
- Calories: 350
- Sugar: 35g
- Sodium: 250mg
- Fat: 18g
- Saturated Fat: 8g
- Unsaturated Fat: 10g
- Trans Fat: 0.5g
- Carbohydrates: 45g
- Fiber: 1g
- Protein: 5g
- Cholesterol: 90mg