
If you’re chasing that utterly luxurious, melt-in-your-mouth chocolate experience, you’ve landed on the right page! I know how intimidating a classic French Silk Pie can look—all that creamy perfection! That’s exactly why I developed this version. Coming from my background in nutrition and years working in professional test kitchens, my goal is always reliability. This is the foolproof recipe you need, and here’s the best part: we’re tackling that big fear right up front. This recipe includes an optional, safe route to achieve that stunningly rich, creamy silk filling without any concern over raw eggs. Trust me, this decadent chocolate dessert is about to become your signature showstopper; you can even check out my deep chocolate salted caramel cake for another show-stopper idea, but this pie is pure silk!
- Why This Is the Best French Silk Pie Recipe You Will Make
- Ingredients for Your Decadent Chocolate Pie
- Step-by-Step Instructions for Foolproof French Silk Pie
- Tips for the Ultimate French Silk Pie Success
- Variations on the Classic French Silk Pie
- Serving Suggestions for Your Silky Smooth Dessert
- Storage and Reheating Instructions for French Silk Pie
- Frequently Asked Questions About Making French Silk Pie
- Share Your Experience Making This French Silk Pie
Why This Is the Best French Silk Pie Recipe You Will Make
Look, there are a million chocolate pies out there, but this French Silk Pie hits different. I spent ages developing this because I wanted that classic, unbelievable texture from the pastry shop but needed it to be totally dependable. It’s everything you want in a decadent chocolate pie. Here’s what makes it worth your time:
- It achieves that elusive, velvety-rich consistency—truly a silky smooth dessert.
- It’s an amazing make-ahead dessert, meaning less stress when company arrives.
- It comes with my guaranteed method for perfect structure, whether you use traditional or pasteurized eggs.
Achieving the Perfect Creamy Silk Filling
The texture is everything here! We handle the chocolate gently—that’s rule number one. By making sure the melted chocolate has cooled off just slightly before mixing it with the creamed butter and sugars, we avoid seizing. Then, folding in the whipped heavy cream is done slowly. This trapping of air is what creates that lightweight, mousse-like experience rather than a dense pudding. It’s all about coaxing the air in!
The No Raw Eggs Option for Peace of Mind
I totally get the hesitation about raw eggs in a filling, so I made sure this recipe accounts for that! If you need peace of mind—especially if I know you’re making this for kids or picky guests—you can simply swap in pasteurized egg products. If you are tempering the yolks slightly over warm water (as the full instructions explain), that process cooks them enough to keep that iconic creamy silk filling beautiful and safe. You don’t sacrifice any of that classic French Silk Pie magic, promise!
If you love fudgy textures that hold up beautifully, you should definitely check out my recipe for fudgy chocolate crinkle cookies next!
Ingredients for Your Decadent Chocolate Pie
Okay, gathering your ingredients is almost the best part—it’s when the dessert starts to feel real! Don’t panic about the list; it looks long, but these are good, simple pantry staples that make this decadent chocolate pie sing. We need rich chocolate, creamy butter, plenty of sugar for depth, and of course, those crucial egg yolks (or their pasteurized pals, you know the drill!).
Make sure everything that needs to be soft is actually soft, especially the butter. You’ll notice I listed an 8-ounce block of semi-sweet chocolate—use good quality stuff here because it really shines through in this rich chocolate dessert. And remember, you can use a store-bought crust, but if you have 10 extra minutes, the Oreo crust is just *chef’s kiss* amazing for this pie.
- 1 (9-inch) pre-baked pie crust (or grab those Oreos!)
- 8 ounces semi-sweet chocolate, finely chopped
- 1/2 cup unsalted butter, softened
- 1/2 cup granulated sugar
- 1/4 cup packed light brown sugar
- 1 teaspoon vanilla extract
- 4 large egg yolks (or use pasteurized eggs if you prefer)
- 1/2 cup cold heavy cream (for the filling)
- 1 cup cold heavy cream, for topping
- 2 tablespoons powdered sugar, for topping
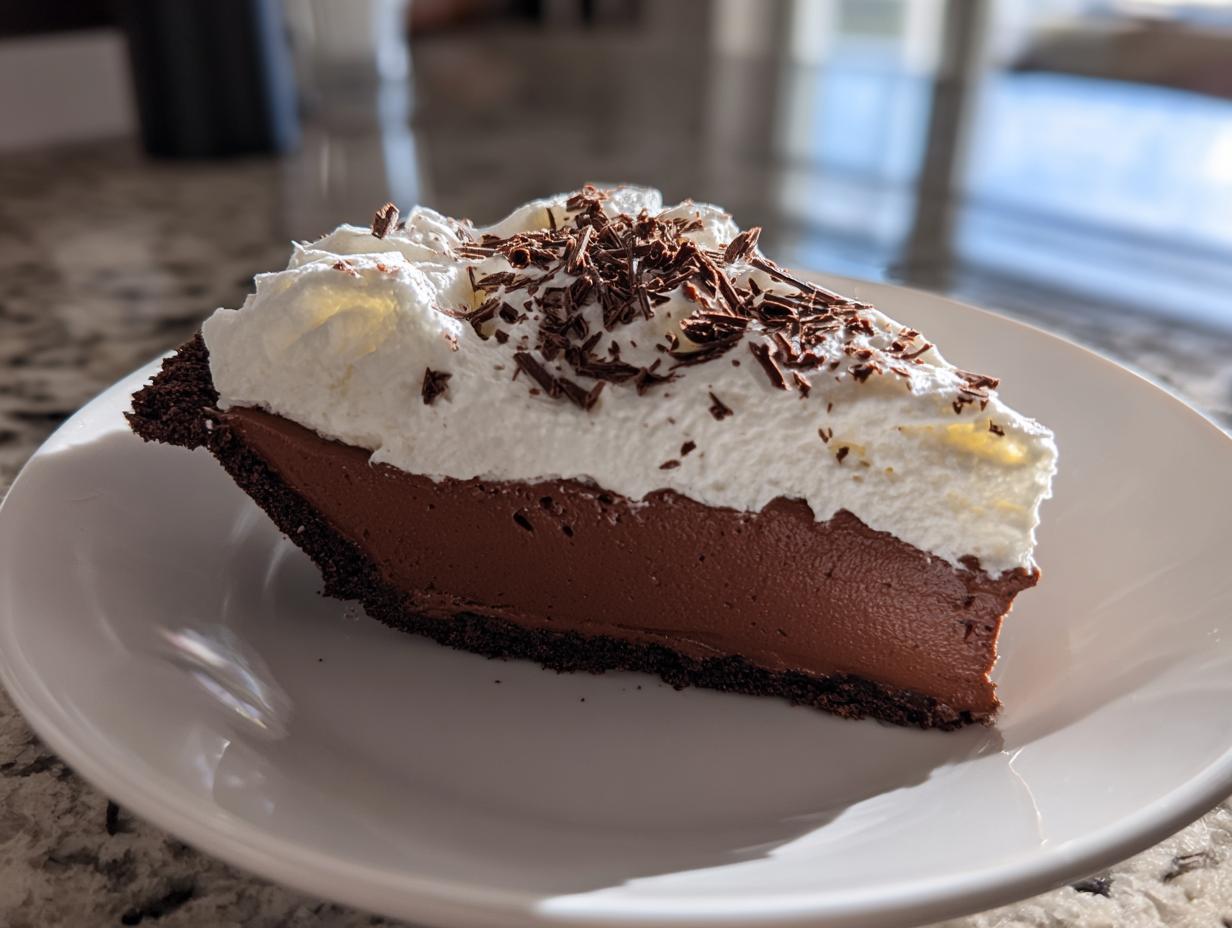
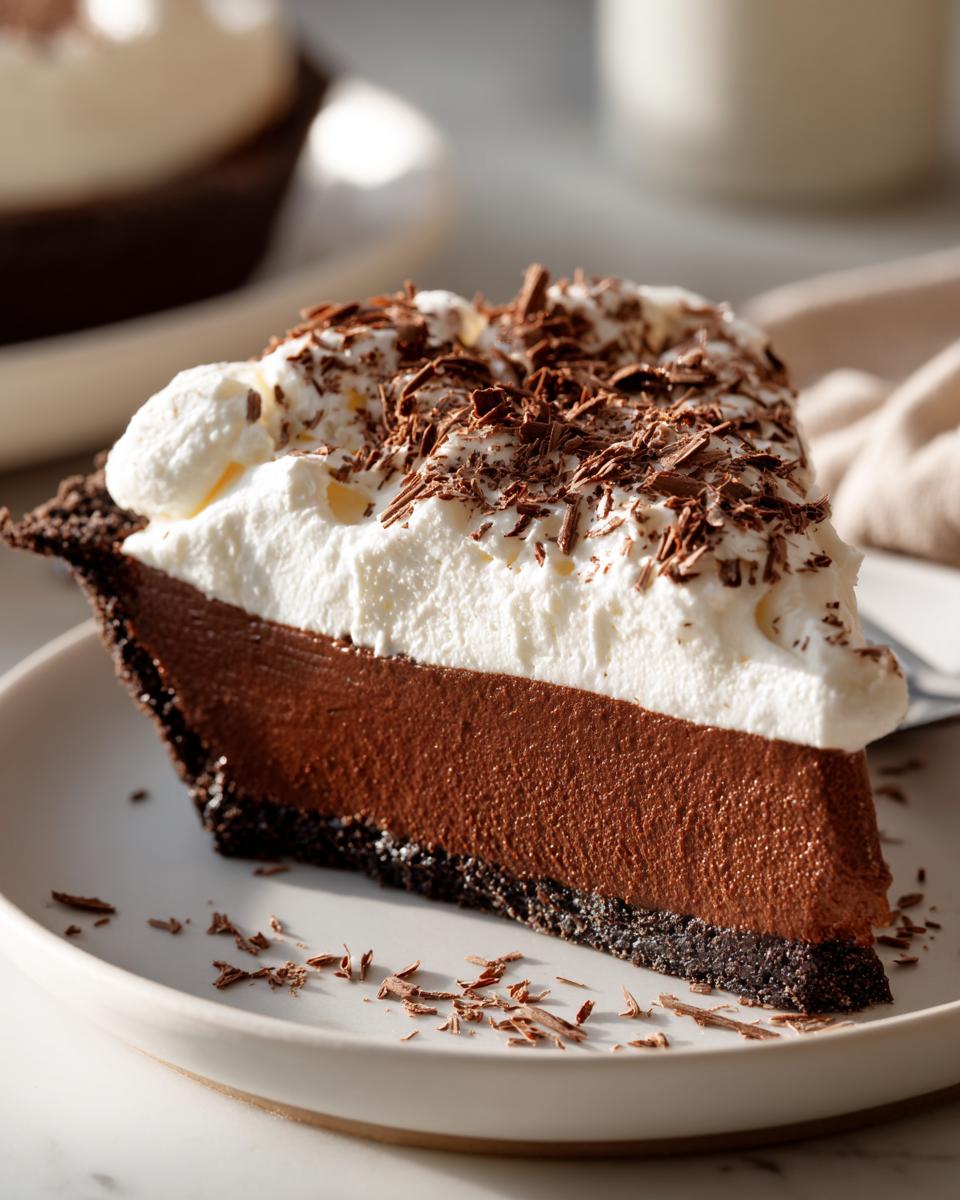
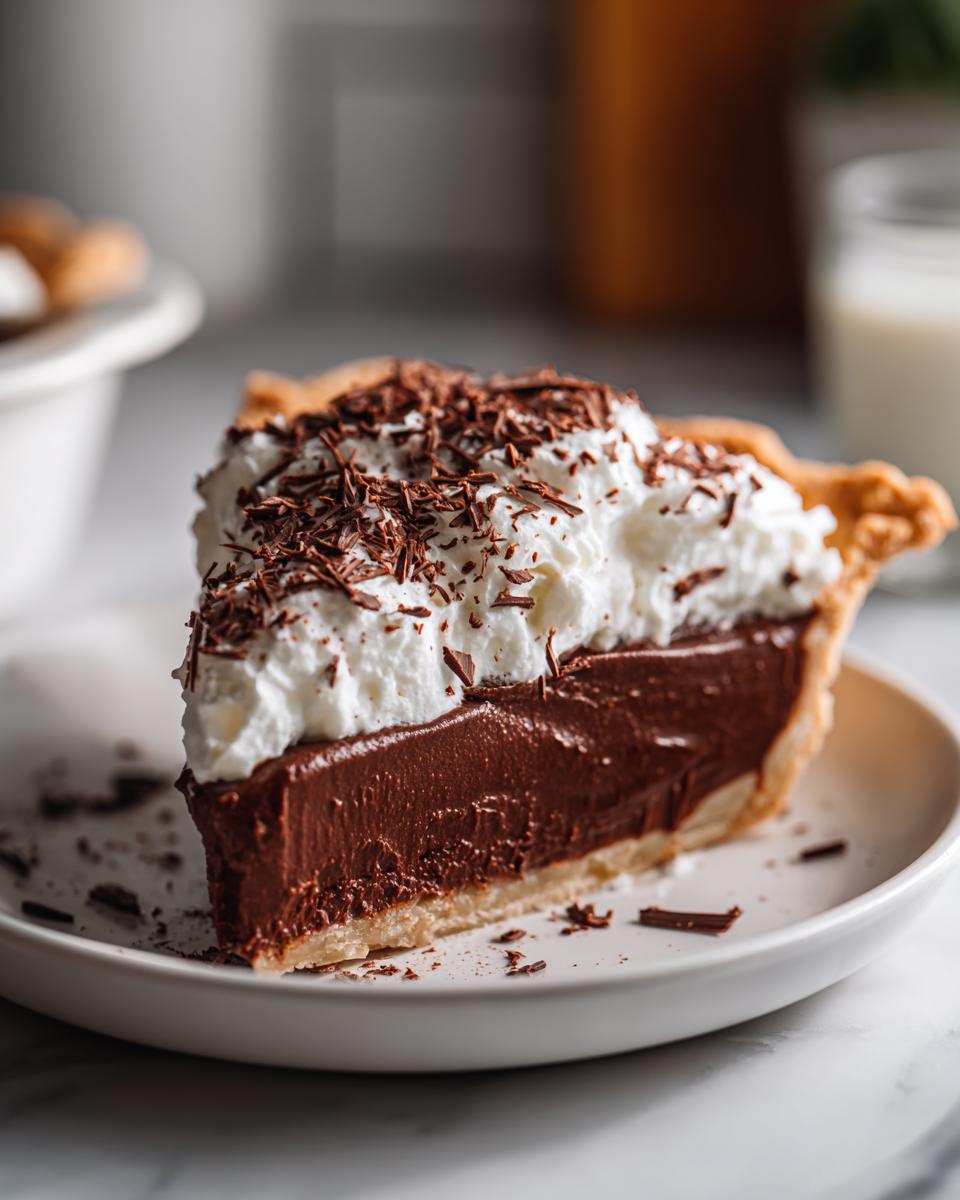
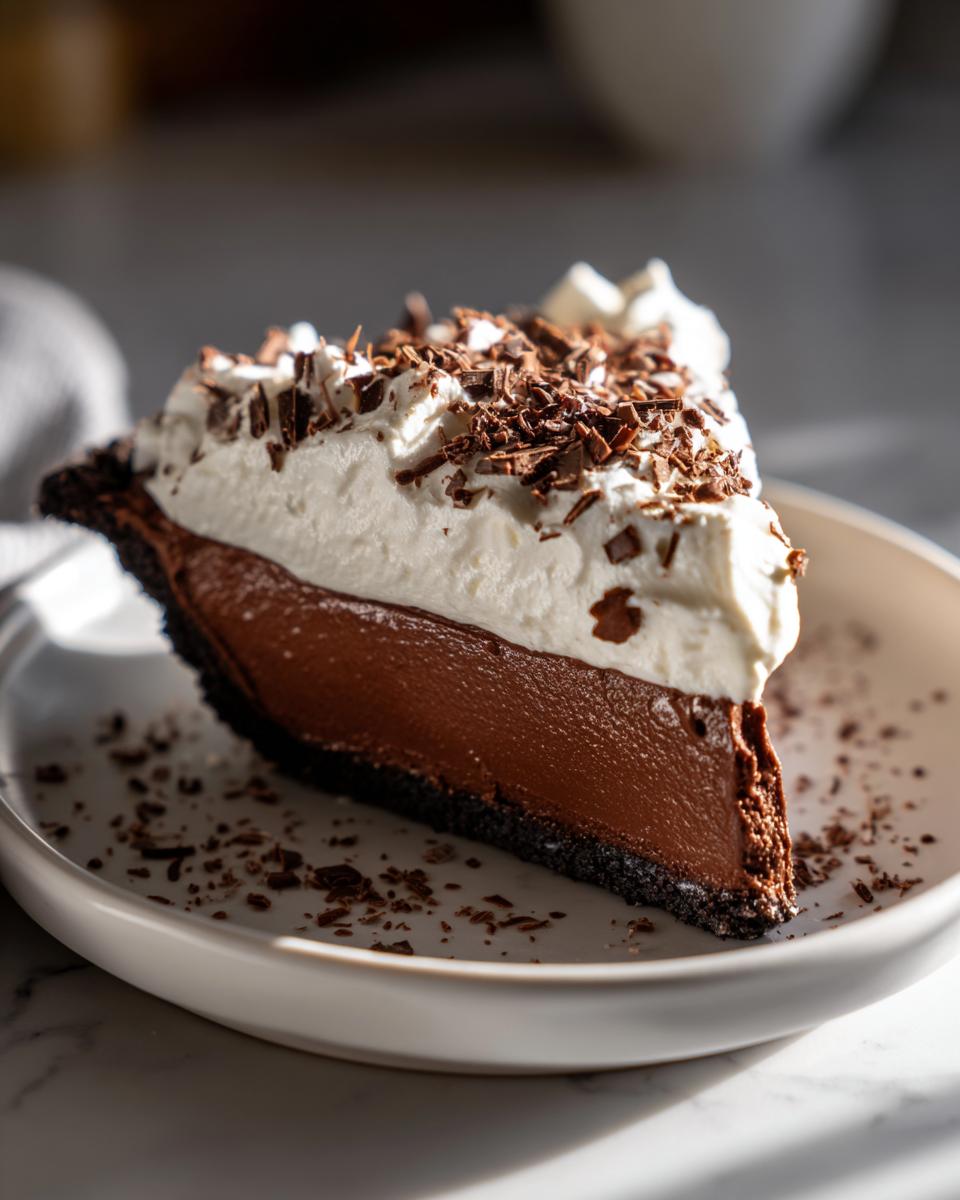
- Chocolate shavings, for garnish—don’t skip this, it adds texture!
I also have a fantastic recipe for moist chocolate banana bread if you ever need to use up some brown bananas!
Crust Options for Your French Silk Pie
If you opt for making your own crust instead of buying one, this classic Oreo Crust Pie variation is non-negotiable for me when making a French Silk Pie. It adds that slight salty crispness that cuts through the overwhelming richness of the filling so perfectly.
Here’s how quick it is: You’ll need about 24 chocolate sandwich cookies—the kind with the white filling is fine, don’t worry about separating them! Crush those up until you have fine crumbs. Mix those crumbs with about 6 tablespoons of melted butter until everything is damp. Then just press that mixture firmly into your pie plate, making sure you get a nice even layer up the sides. Pop it in the fridge to chill while you focus on that amazing filling. It needs to be cold before we pour in that silky goodness!
Step-by-Step Instructions for Foolproof French Silk Pie
Alright, deep breath! This is where the magic happens. We are going to take those carefully prepped ingredients and turn them into the most decadent chocolate pie you’ve ever seen. Don’t rush these steps—patience here is what separates a good pie from the best French silk pie recipe the internet has ever seen. Remember, this is designed to be easy, so just follow along. If you need some quick ideas for how to manage that timing alongside dinner, I always rely on my list of easy weeknight dinners to keep things streamlined!
Preparing the Silky Chocolate Base
First, we need silky chocolate. Set up a double boiler—that’s just a heatproof bowl over a pot of barely simmering water, super simple! Melt your finely chopped chocolate in that bowl. Stir it until it’s perfectly smooth. Once it’s melted, take it off the heat right away. This is important: let it cool down for just a few minutes. Seriously, if it’s piping hot, it can scramble your butter or yolk mixture later. While that’s cooling, grab your big mixing bowl. Beat the softened butter, both sugars—granulated and brown—until it looks genuinely light and fluffy, almost pale yellow. Next, beat in the vanilla and those egg yolks one at a time. Once those are mixed in, slowly drizzle in that slightly cooled melted chocolate. Keep mixing until the whole thing looks uniform. That smooth base is what we’re aiming for!
Creating the Velvety Chocolate Dessert Filling
Now for the air! Grab your ½ cup of cold heavy cream and whip it up until you get soft peaks. You don’t want stiff Everest peaks here, just something that holds a little shape. Gently, and I mean gently, fold that whipped cream into your chocolate base. Use a spatula and bring the chocolate up and over the cream. We are trying to keep all those lovely air pockets we just created! This folding step is key to that lovely, light texture, giving you that true rich chocolate dessert experience instead of a heavy fudge. Once it’s just combined—you shouldn’t see huge streaks of white cream anymore—it’s ready for the crust. Don’t overmix, or you’ll deflate all your hard work!
Setting and Topping the French Silk Pie
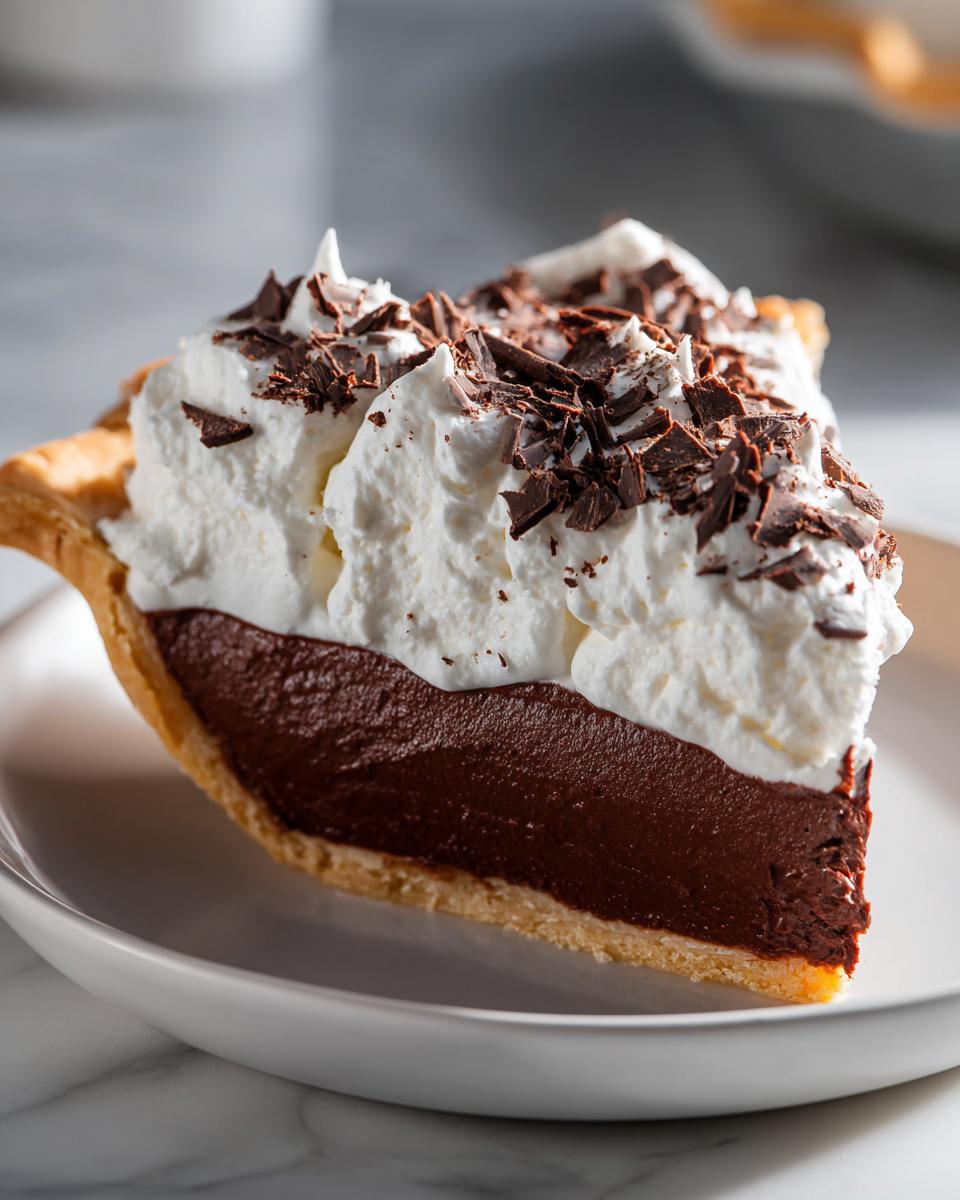
Go ahead and pour that dreamy filling right into your chilled crust! Smooth the top off with your spatula. Because this is such an easy make-ahead dessert, we need patience now. Pop the whole thing into the refrigerator. You absolutely must chill this pie for a minimum of four hours, but honestly? If you can let it set up overnight, it gets even better. The filling firms up beautifully as it chills. When you’re ready to serve, whip up the remaining 1 cup of cold heavy cream with the powdered sugar until you get those stiff, beautiful peaks. Spread that whipped cream all over the top, finish it with some chocolate shavings if you’re feeling fancy, and get ready for applause!
Tips for the Ultimate French Silk Pie Success
Making a great French Silk Pie means paying attention to a couple of small things that make a huge difference, transforming it from good to absolutely show-stopping. My biggest piece of advice for getting that truly foolproof silk pie texture? Temperature control, hands down.
Always make sure your butter is perfectly softened—not melted, just pliable! Also, when you melt your chocolate, give it a minute or two off the heat before it goes into the butter mixture. If the chocolate is too hot, it ruins the structure we worked so hard to build with the creaming step. Finally, and this is optional but highly recommended: try making it the day before you plan to serve it. Chilling overnight lets that velvety chocolate dessert filling firm up to absolute perfection. If you love easy, creamy make-ahead desserts, you’ve got to try my easy creamy mango sticky rice recipe next time!
Variations on the Classic French Silk Pie
Now that you’ve mastered the glorious, iconic version of this French Silk Pie, I want you to feel totally free to play around with it! That’s what cooking is all about, right? Taking a fantastic base and making it your own. Since the filling is so forgiving and rich, it adapts to different flavors so easily. You don’t need a whole new recipe; just a fun little tweak!
First, let’s talk crusts again. While that chocolatey Oreo crust is my absolute favorite for cutting the richness, you could totally switch it up to make it a classic holiday pie recipe. Try using a buttery, flaky traditional pastry crust instead—it gives you a cleaner flavor profile. Or, if you want something super easy and slightly sweet, a graham cracker crust works like a charm!
For flavor additions, a little dash of something extra can really elevate this. If you’re a huge fan of deep chocolate notes, try whisking in about a teaspoon of instant espresso powder right into your melted chocolate. It won’t taste like coffee, but it will make that chocolate flavor *pop* like crazy. I also love adding half a teaspoon of pure mint extract when I’m whipping the heavy cream filling if I want a fun, festive twist. Imagine that cool mint meeting that deep chocolate—it’s divine!
If you’re looking for something great for a crowd, check out the ideas available online, like how they turn this into a slab pie! That’s perfect for big gatherings where everyone needs a piece of that silky smooth dessert.
Serving Suggestions for Your Silky Smooth Dessert
You’ve done the hard work, and now it’s time to present this masterpiece! A rich chocolate dessert like this French Silk Pie doesn’t just need to taste amazing; it needs a grand entrance, too. Since the filling is so intensely chocolatey and luxurious, the best pairings are usually light, bright, or something that perfectly complements that deep cocoa flavor.
My absolute favorite way to serve slices of this creamy silk filling pie is alongside something tart or fresh. Think about a small bowl of fresh raspberries or sliced strawberries—the slight acidity cuts through the richness perfectly. It just brightens up every bite, making you ready for the next forkful!
If you’re serving this after a big holiday meal, a simple, strong cup of coffee is the best partner. The bitterness of a quality dark roast is magic with that sweet, velvety chocolate dessert. Honestly, I love it with a strong splash of Kahlúa on the side, but you didn’t hear that from me! If you enjoy combining fruit and spice, you have to try my cranberry orange scones sometime—though they are definitely for breakfast, not pie topping!
And don’t forget the presentation! A little extra dusting of finely grated dark chocolate or even some small chocolate curls right on top of the whipped cream adds that final professional touch to your silky smooth dessert.
Storage and Reheating Instructions for French Silk Pie
This is one of my favorite parts about making this French Silk Pie—it’s a perfect make-ahead dessert! Because the filling is based on a rich chocolate mousse stabilized with fat (and that glorious whipped cream topping), storage is pretty straightforward, but you do need to be mindful of that topping.
You absolutely must store this pie covered tightly in the refrigerator. Don’t let it sit out on the counter for more than an hour or two, especially if you used the fresh whipped cream topping. The filling structure holds up incredibly well when cold. If you cover it loosely with plastic wrap, making sure the wrap doesn’t touch the whipped cream peaks, it tastes fantastic for about three to four days. It’s honestly better on day two!
Can you freeze it? Yes, you can, but I have a slight condition for freezing this creamy silk filling masterpiece! If you plan to freeze, I strongly suggest you skip the whipped cream topping first. Freeze the pie plain in the crust, covered tightly with plastic wrap and then a layer of foil. When you’re ready to thaw, move it to the fridge the day before you want to serve it. Once it’s mostly thawed (or fully thawed and set), *then* you can whip fresh cream and decorate it. That way, the topping stays fluffy and perfect, not watery!
If you’re interested in making other things last longer in the fridge, check out my guide on refrigerator pickles—it’s all about keeping things fresh and crisp!
Frequently Asked Questions About Making French Silk Pie
I’ve answered so many questions about this pie over the years, especially when people are nervous about getting that ultra-smooth texture! Here are a few things I hear constantly. If you run into a snag, I promise, it’s usually a super easy fix. For more deep-dive tips on baking success, I always point folks to the amazing resources out there, like Handle the Heat.
Can I make the French Silk Pie completely No Bake?
That’s a great question! Since this specific recipe calls for a pre-baked crust, you are technically already skipping the baking part for the filling! Once the crust is cool, the filling just needs chilling time to magically set up firm—thanks to the butter and cream content. So yes, in spirit, it’s a fantastic no-bake dessert once you have that crust sorted out. Just make sure that crust is cooled completely before you pour in that beautiful filling!
Which type of chocolate works best for this Rich Chocolate Dessert?
This is where you can really tell the difference between good and absolutely stellar. For this rich chocolate dessert, you need high-quality chocolate. I specifically call for semi-sweet chocolate. Don’t try to substitute with milk chocolate here; it has too much sugar and fat, and it won’t give you that deep, intense chocolate flavor we need to balance the sweetness of the crust and the topping.
If you can find a chocolate bar that’s around 60% cacao, that’s usually the sweet spot! Remember, since the chocolate is the star of the creamy silk filling, using the best you can afford really pays off in the end result.
What do I do if my filling looks grainy instead of silky?
Oh no, let’s fix that! Graininess usually means two things happened: either the chocolate was too hot when added to the butter mix, or the mixture got too cold when you were folding in the cream. If it’s just slightly grainy, sometimes giving your mixture a quick whisk over very low heat (off the stove!) for just 30 seconds can help melt those tiny sugar or chocolate bits back into the batter. But honestly, if you catch it before chilling, it’s usually fine once it sets. That’s why checking the smoothness right before the final fold matters so much for that silky smooth dessert finish!
Since I used the no raw egg option, do I still need to chill it for 4 hours?
Yes, you absolutely do! Even if you use pasteurized eggs or skip the yolks entirely and rely on the tempering method for safety, the structure of the pie relies heavily on chilling. The butter and the melted chocolate need time to solidify again at a cold temperature, which is what turns that lovely mousse into sliceable pie filling. Four hours is the minimum, but trust me, overnight is best for a truly foolproof silk pie!
Share Your Experience Making This French Silk Pie
Now that you’ve got this phenomenal, decadent chocolate pie sitting perfectly chilled in your fridge (or maybe you’ve already dove into a slice—no judgment here!), I truly want to hear about it!
This is why I share these recipes; I love building a community where we can all celebrate those kitchen wins together. Knowing you felt confident making a showstopper like this French Silk Pie is the best reward for me!
When you’ve had a chance to slice into that gorgeous, creamy silk filling, please come back here and leave a star rating. It helps me know which recipes are your absolute favorites. And if you made any fun tweaks or have a story about who you served it to—maybe it was your new favorite holiday pie recipe addition?—drop it in the comments below!
Baking is all about sharing the joy, so let me know how your silky smooth dessert turned out!
PrintFoolproof French Silk Pie Recipe (No Raw Eggs Option)

Create a rich, creamy, and velvety French Silk Pie with this straightforward recipe. This version includes an option to safely prepare the filling without using raw eggs, making it a perfect decadent chocolate dessert for any special occasion.
- Prep Time: 25 min
- Cook Time: 0 min
- Total Time: 4 hr 25 min
- Yield: 8 servings 1x
- Category: Dessert
- Method: Chilling
- Cuisine: American
- Diet: Vegetarian
Ingredients
- 1 (9-inch) pre-baked pie crust (or use a homemade Oreo crust)
- 8 ounces semi-sweet chocolate, finely chopped
- 1/2 cup unsalted butter, softened
- 1/2 cup granulated sugar
- 1/4 cup packed light brown sugar
- 1 teaspoon vanilla extract
- 4 large egg yolks (or use pasteurized egg product for no raw eggs)
- 1/2 cup cold heavy cream
- 1 cup cold heavy cream, for topping
- 2 tablespoons powdered sugar, for topping
- Chocolate shavings, for garnish
Instructions
- Prepare your 9-inch pie crust and set it aside to cool completely if you baked it from scratch.
- Melt the chopped chocolate in a heatproof bowl set over a saucepan of simmering water (a double boiler), stirring until smooth. Remove from heat and let cool slightly.
- In a large bowl, beat the softened butter, granulated sugar, and brown sugar with an electric mixer until the mixture is light and fluffy. Beat in the vanilla extract.
- Beat in the 4 egg yolks one at a time until fully combined. Mix in the slightly cooled melted chocolate until the mixture is uniform.
- In a separate bowl, whip the 1/2 cup of cold heavy cream until soft peaks form. Gently fold the whipped cream into the chocolate mixture until just combined, creating the silky filling base.
- If you are using the no-raw-eggs method, ensure your chocolate mixture is warm enough to pasteurize the yolks if you used them, or proceed directly if using pasteurized egg product. The goal is a smooth, mousse-like texture.
- Pour the chocolate silk filling into the cooled pie crust. Smooth the top with a spatula.
- Chill the pie in the refrigerator for at least 4 hours, or until the filling is completely set.
- Before serving, whip the remaining 1 cup of cold heavy cream with the powdered sugar until stiff peaks form. Spread or pipe the whipped cream over the chilled pie.
- Garnish the top with chocolate shavings. Slice and serve immediately.
Notes
- For an Oreo crust, crush 24 chocolate sandwich cookies and mix with 6 tablespoons of melted butter. Press into the pie plate and chill while you prepare the filling.
- To achieve the silkiest texture, make sure your melted chocolate is not too hot when added to the butter mixture.
- This is an excellent make-ahead dessert; it sets best when chilled overnight.
Nutrition
- Serving Size: 1 slice
- Calories: 450
- Sugar: 35g
- Sodium: 150mg
- Fat: 32g
- Saturated Fat: 18g
- Unsaturated Fat: 14g
- Trans Fat: 0.5g
- Carbohydrates: 38g
- Fiber: 3g
- Protein: 5g
- Cholesterol: 110mg