
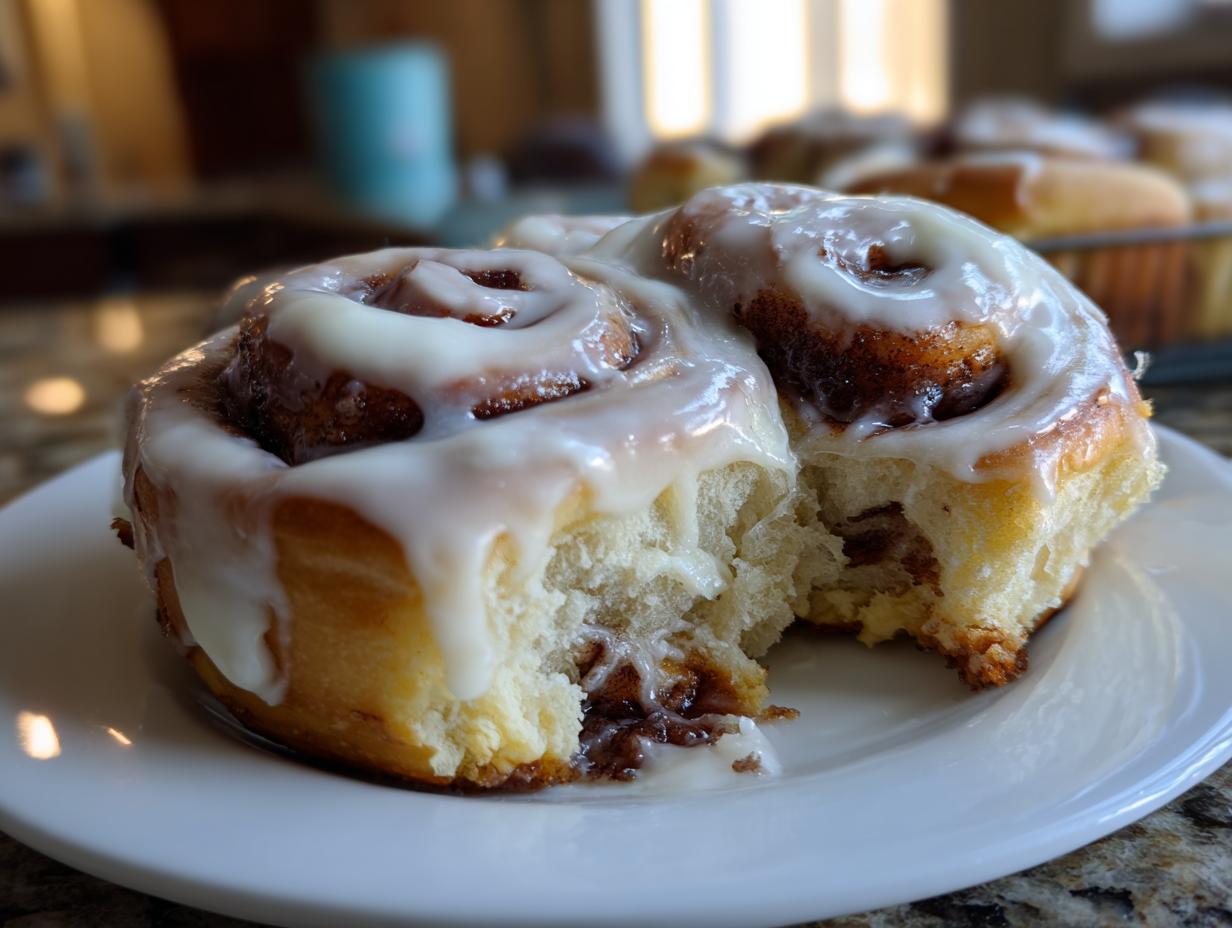
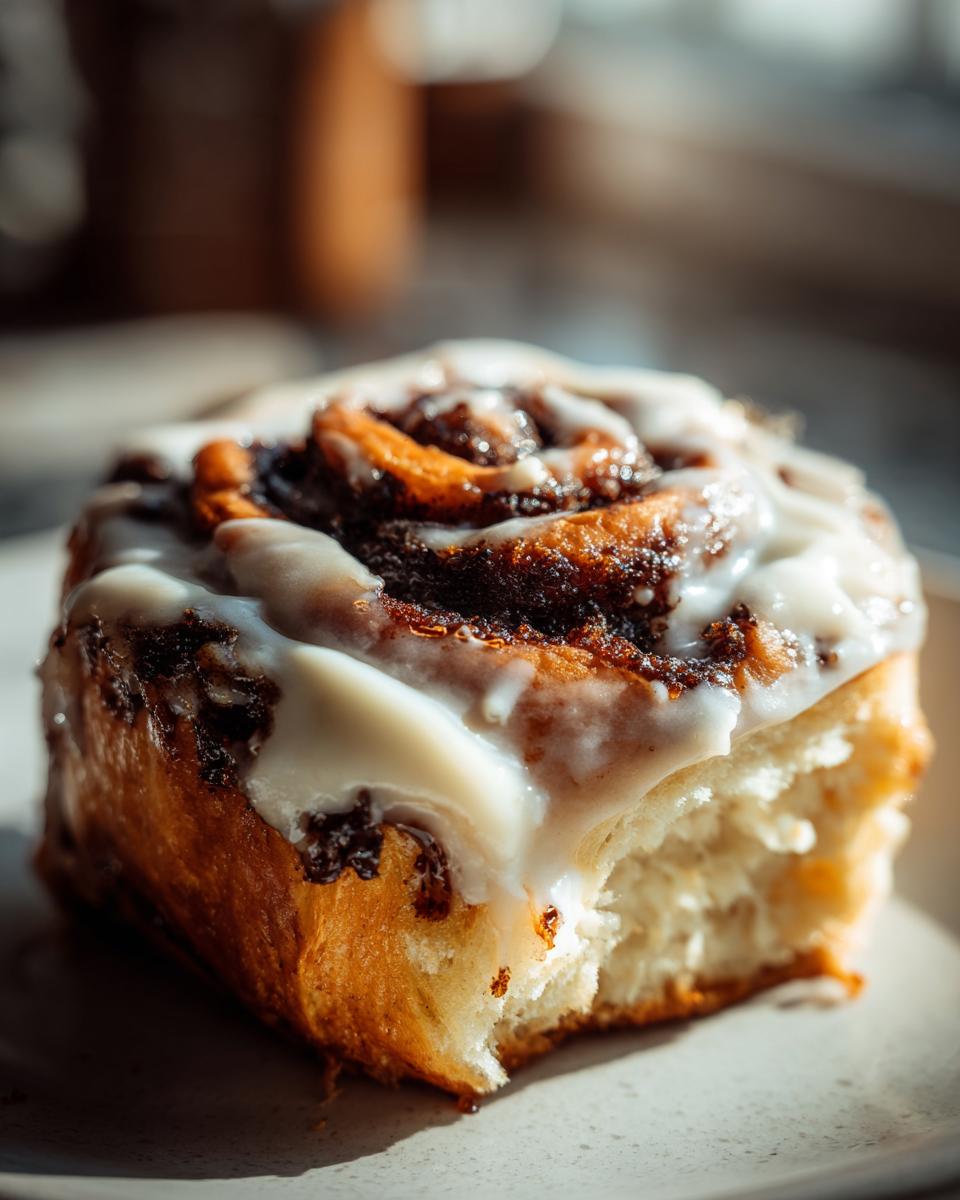
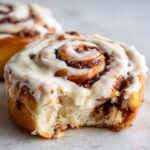
Oh goodness, when those cinnamon buns start baking, the smell that fills the house is just heavenly! Seriously, nothing beats that warm, sweet cloud wafting out of the oven. I’m not just sharing any recipe today; I’m giving you my absolute favorite formula for the ultimate soft and gooey homemade cinnamon buns, crowned with the best cream cheese frosting you’ve ever tasted. Forget dry, tough rolls! Thanks to my time working in professional test kitchens, I’ve fine-tuned this recipe to guarantee you get those perfect, bakery-style results right in your own kitchen. Trust me, this dough recipe is foolproof, and these initial steps toward making these sweet breakfast pastries are totally worth it—they disappear way too fast!
- Why You Will Love These Soft and Fluffy Homemade Cinnamon Buns Recipe
- Gathering Ingredients for Perfect Cinnamon Buns
- Step-by-Step Instructions for Bakery Style Cinnamon Rolls From Scratch
- Crafting the Luscious Cream Cheese Frosting for Your Cinnamon Buns
- Tips for Success Making Gooey Cinnamon Buns
- Make-Ahead & Storage for Homemade Cinnamon Buns Recipe
- Flavor Variations for Your Sweet Breakfast Pastries
- Frequently Asked Questions About Making Cinnamon Buns
- Serving Suggestions for These Comfort Food Baking Classics
- Estimated Nutritional Data for One Serving of Cinnamon Buns
- Share Your Ultimate Soft & Gooey Homemade Cinnamon Buns Experience
Why You Will Love These Soft and Fluffy Homemade Cinnamon Buns Recipe
I tested batch after batch to make sure these hit every single mark when you pull them out of the oven. These aren’t just good cinnamon buns; they are *the* ones that will make people ask for the recipe every single time. Here’s why I know you’re going to adore this Homemade Cinnamon Buns Recipe:
- They are unbelievably soft and fluffy! We use a specific technique with our yeast dough that locks in moisture for days.
- The filling achieves that perfect, gooey cinnamon texture without any of the messy leakage you sometimes get.
- We don’t skimp on the frosting! The Best Cream Cheese Frosting Recipe mentioned here is tangy, rich, and completely melts into the warm swirls.
- Achieving Bakery Style Cinnamon Rolls From Scratch is totally doable here; I guarantee they look and taste like they came from a high-end bakery, but you made them!
- We nail the timing for a fantastic rise, making this an achievable, though deeply satisfying, weekend bake. Check out some of my other ideas for quick and easy breakfasts while you’re waiting for the dough to prove!
Gathering Ingredients for Perfect Cinnamon Buns
Alright, let’s talk supplies! Getting the right stuff ready ahead of time is half the battle won when you’re working with yeast dough. I’ve learned that being super clear about precise temperatures and textures makes all the difference between good rolls and the truly amazing, gooey ones we are aiming for here. This isn’t the time to guess! Having all your components measured out guarantees the dough handles beautifully when the time comes to roll it out.
For the Yeast Dough
The foundation of these fluffy cinnamon rolls relies on everything being calibrated just right, especially that milk temperature. You want it warm enough to wake up that yeast, but not so hot that you kill it dead! Remember, we are aiming for 110°F—that’s the sweet spot.
- 1 cup whole milk, warmed to 110°F
- 2 1/4 teaspoons active dry yeast
- 1/2 cup granulated sugar, divided (we save a teaspoon for the yeast!)
- 1/4 cup unsalted butter, softened
- 1 large egg, room temperature (this really helps the dough combine nicely)
- 3 1/2 cups all-purpose flour, plus more for dusting
- 1 teaspoon salt
For the Gooey Cinnamon Filling
This filling is where the magic happens! We need that gorgeous, spreadable texture so it melds perfectly into every swirl without tearing the delicate dough. Please make sure your butter is actually softened—like finger-squishy soft—but definitely not melted into a greasy puddle!
- 1/2 cup unsalted butter, softened (this is key for an even spread!)
- 1 cup packed light brown sugar
- 2 tablespoons ground cinnamon
For the Best Cream Cheese Frosting Recipe
This frosting is non-negotiable; it brings the perfect tangy counterpoint to all that sweet cinnamon filling. Just like with the filling, our cream cheese and butter must be soft so we don’t end up with sad little lumps in our gorgeous glaze. A good mixer will handle this beautifully!
- 1/2 cup cream cheese, softened
- 1/4 cup unsalted butter, softened
- 2 cups powdered sugar, sifted (sifting stops those gritty surprises!)
- 1 teaspoon vanilla extract
- 1-2 tablespoons whole milk (we adjust this later for the perfect drizzle consistency)
Once everything is gathered, you can check out my guide on getting the best cream cheese frosting recipe dialed in perfectly!
Step-by-Step Instructions for Bakery Style Cinnamon Rolls From Scratch
Now for the fun part—bringing these fluffy cinnamon rolls to life! Don’t let yeast scare you. As long as you pay attention to the temperature and the texture of the dough, you’ll be a pro in no time. My goal here is to get you those pillowy-soft, gooey layers that melt in your mouth, just like they do at the best bakeries.
Activating the Yeast and Mixing the Dough
First things first, we wake up that yeast. Pour your warmed milk (remember, 110°F!) into a bowl, sprinkle in the yeast and that tiny bit of sugar, and just let it sit for about 10 minutes. If it gets bubbly and foamy on top, great! That means your yeast is happy and ready to work. Next, mix in the rest of your wet ingredients—the softened butter, the remaining sugar, and the egg.
In a separate bowl, whisk your flour and salt together. Now, gradually add the dry stuff to the wet stuff. Mix until it forms a shaggy ball. Then, turn it out onto a floured counter. You need to knead this for a solid 6 to 8 minutes. Keep going until it feels smooth and springy, like a soft earlobe. You’re looking for elastic, not sticky!
First Rise and Preparing the Cinnamon Filling
Put that beautiful dough into a lightly oiled bowl—give it a little toss to coat. Cover it loosely and tuck it into a warm spot. Patience is key here! Let it double in size, which usually takes about an hour to an hour and a half. Don’t rush it; a slow, happy rise makes for tender rolls.
While that dough is getting happy, mix up your filling. Take that softened butter, the packed brown sugar, and the cinnamon, and mash it all together until it’s a uniform, spreadable paste. It should be thick enough to stay put but soft enough to glide right over your dough.
Rolling, Filling, and Shaping Your Cinnamon Buns
Once doubled, gently punch the air out of the dough—we don’t want to deflate it completely, just knock the wind out of it. Roll it out on a lightly floured surface into a perfect 12 by 18-inch rectangle. Try to keep the thickness even across the whole thing! Now, take your cinnamon-butter mixture and spread it edge-to-edge, leaving just a small strip bare on one of the long sides. This bare edge helps seal the deal!
Starting from the long side opposite that bare edge, roll that dough up as tightly as you possibly can without squishing out the filling. Pinch that final seam closed really well. Now, for the cuts! Use unflavored dental floss slid under the log—it gives you the cleanest slice. Cut that log into 12 equal rolls. Seriously, floss works better than any knife I’ve ever used!
Second Rise and Baking for Fluffy Cinnamon Rolls
Grease up your 9×13 pan—don’t skip this! Place those 12 swirly beauties inside, making sure they’re snug but not touching yet. Cover them again and let them have a second, shorter rest for about 30 to 45 minutes until they look puffy and big. You’ll need to preheat your oven to 375°F during this final rest.
Bake them for 20 to 25 minutes. Watch them carefully! They are done when they look nicely golden brown on top. Remember, we want to avoid baking too long; that’s how we keep everything inside super gooey!
Want more tips on handling yeast doughs? I walk through the details just like this when I teach my homemade dinner rolls recipe too!
Crafting the Luscious Cream Cheese Frosting for Your Cinnamon Buns
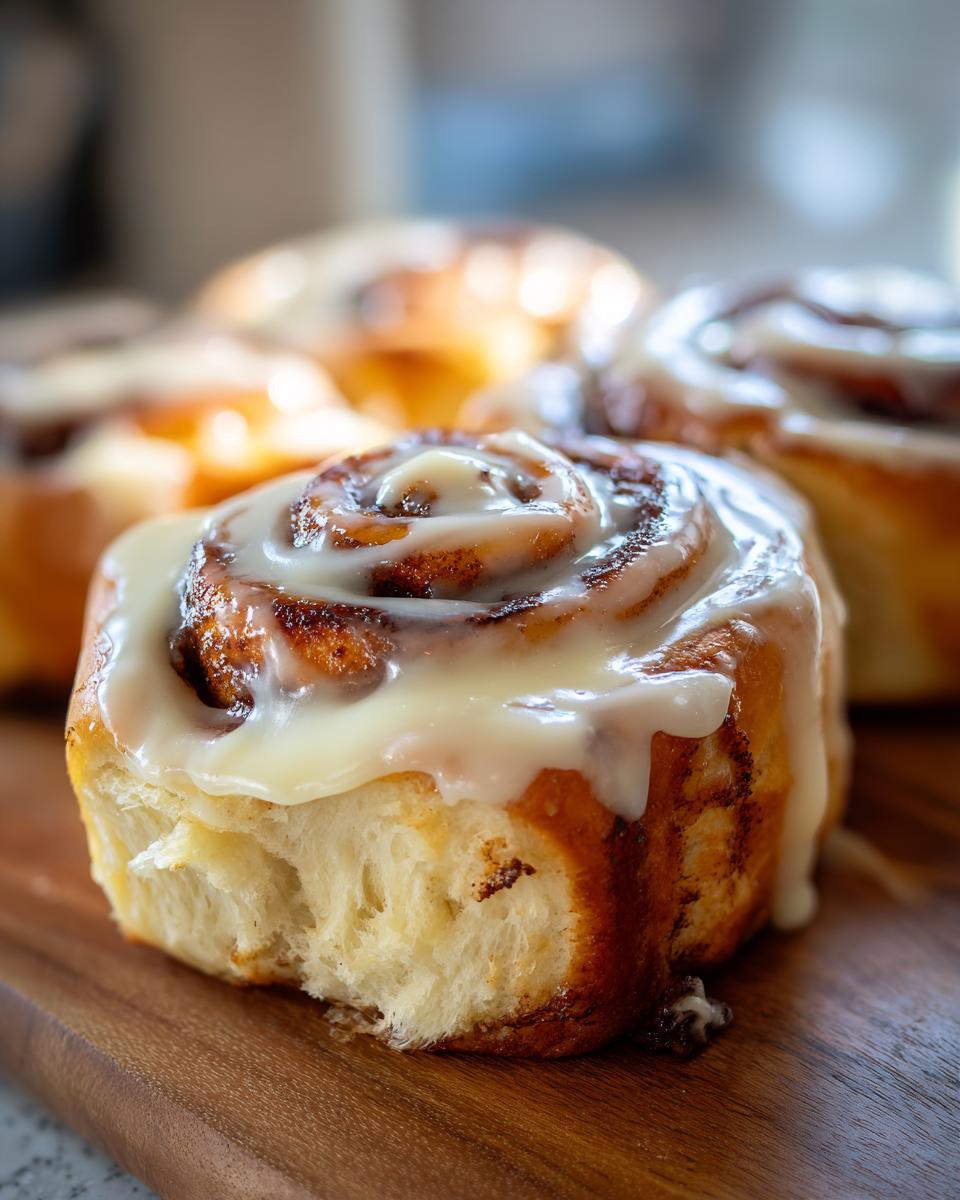
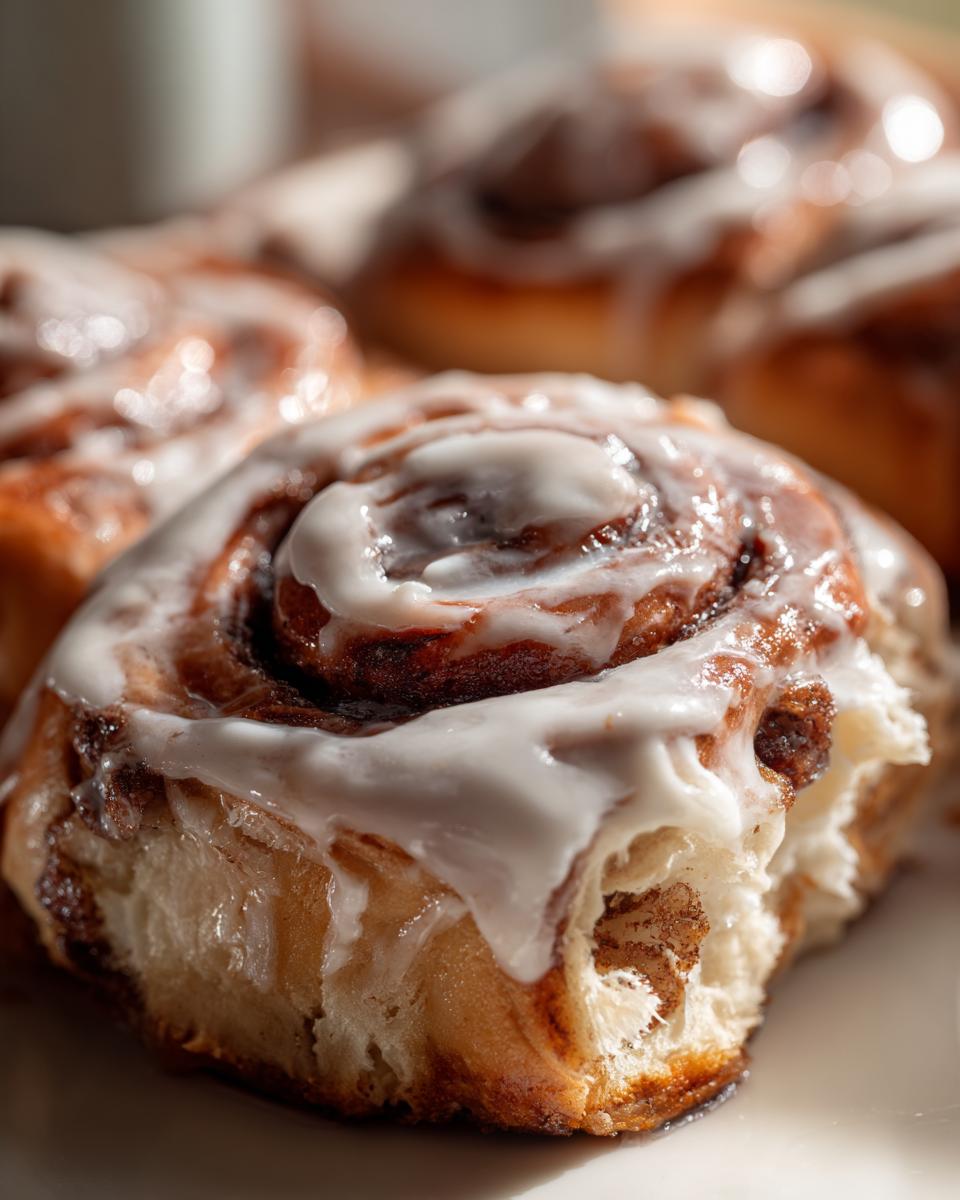
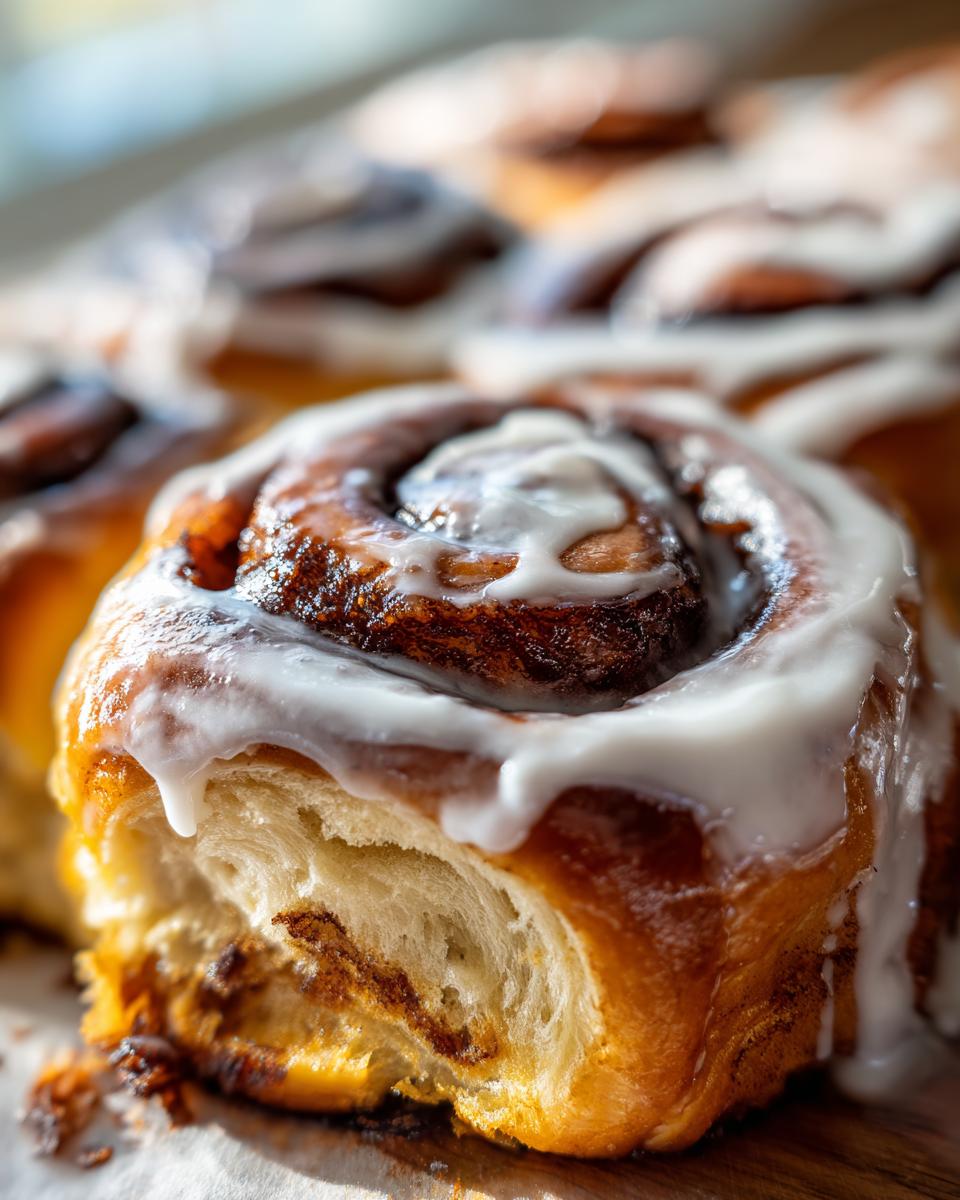
Okay, we are nearing peak deliciousness now! The final step to wrapping up these ultimate soft and gooey homemade cinnamon buns is, of course, the frosting. Seriously, you can’t have a spectacular roll without this tangy, sweet topping. We want this cream cheese frosting thick enough to hold its shape a little, but soft enough that when you spread it over those warm cinnamon buns, it instantly starts to melt down into all those gorgeous, craggy crevices.
Here’s my secret for the perfect texture: Beat your softened cream cheese and butter until they are completely smooth—no lumps allowed! Then add the vanilla and the powdered sugar slowly. If it seems too thick to spread easily, don’t panic! Just add your milk, one teaspoon at a time. I always aim for a consistency that drips slowly off my spatula, not one that streams immediately. This ensures that beautiful, gooey layer without drowning your lovely rolls!
If you want to learn more about stabilizing icings in general, I have a great post on vanilla buttercream that is both fluffy and stable—same principles apply here!
Tips for Success Making Gooey Cinnamon Buns
Baking is chemistry, and when it comes to yeast dough like this, a few small details can make or break the texture. I’ve made enough batches to know exactly what traps keep these cinnamon buns perfectly soft and gooey, rather than letting them turn into hockey pucks by lunchtime! Don’t stress, though; it’s all about paying close attention during the mixing and shaping phases. Following these little pointers keeps the process fun and guarantees those irresistible results we’re after.
Ingredient Temperature Matters for Yeast Dough
I can’t stress this enough: those room temperature ingredients are your best friends when dealing with yeast! If your milk is too hot, that yeast dies before it can start its work, and you end up with flat, dense dough. If your egg or butter is ice cold right out of the fridge, it shocks the yeast and slows everything down, leading to a poor rise.
When you pull out your ingredients, give them at least 30 minutes on the counter. If you rush that one-hour rise by starting with cold components, you’ll need an extra 30 minutes anyway! A slow, warm rise creates those beautiful air pockets that give you the fluffiest texture. If you’re having trouble getting that rise, maybe check out my ideas for quick weeknight dinners while you wait, but never force the dough!
Preventing Filling Leakage
The biggest heartbreak with cinnamon buns is when the filling decides to abandon ship during the second rise or the bake! It oozes out the bottom and burns right onto your pan. We want that filling gooey *inside* the roll, not swimming in sauce underneath it.
My best trick here involves securing the outside edge. After you roll that log up tightly, really press down hard on that final seam where the two sides meet—pinch it closed with your fingers until you feel it seal completely. If you’re worried the filling is too soft when you spread it? Give that filling bowl a quick 10-minute trip into the freezer before you spread it. It stiffens up just enough so it stays put when you start rolling and slicing. A tight log and a well-pinched seam are your insurance policy against messy spills!
Make-Ahead & Storage for Homemade Cinnamon Buns Recipe
Who doesn’t love waking up to the promise of fresh baking without actually having to get up hours early? That’s the beauty of preparing these glorious cinnamon buns ahead of time! This recipe is absolutely perfect for planning an easy Christmas morning or a relaxed Sunday brunch because we can totally convert this into an Overnight Cinnamon Buns Recipe. It’s such a lifesaver when you have company or just want to savor your weekend!
To make them overnight, you need to follow all the rolling, filling, and slicing steps just as we discussed. Once you’ve cut the rolls and placed them snugly into your greased 9×13 baking dish, this is where you diverge from the usual path. Cover the whole dish tightly—I mean *really* tightly—with plastic wrap. If you’re worried about plastic touching the tops, you can lightly spray the plastic wrap itself with non-stick spray first. Then, tuck the whole thing into the refrigerator.
They can happily chill and proof slowly in the fridge for up to 12 hours. That slow, cold proofing actually develops amazing flavor, leading to some truly magnificent rolls the next morning!
When it’s time to bake, just pull them out of the fridge. If they look cold and tight, let them sit on the counter for about 30 minutes while the oven preheats to 375°F. If you’re eager, you can bake them straight from the cold, but you must add about 10 minutes to the baking time we originally set. Keep an eye on them; you want that beautiful golden brown still!
If you have leftovers (which is rare in my house!), just store them covered at room temperature for a day or two. For best results, store them unfrosted. When you’re ready to enjoy them again, gently reheat them. I love placing one or two on a microwave-safe plate with just a splash of milk or water on the side, then covering it loosely with a paper towel and zapping it for 15-20 seconds. That steam brings back all the softness!
If you’re looking for more make-ahead morning magic, you’ve got to see how I prep my super easy Christmas Breakfast Casserole the night before, too!
Flavor Variations for Your Sweet Breakfast Pastries
While the classic combination of soft dough, rich filling, and tangy cream cheese frosting is pure heaven, sometimes you just need to mix things up a little, right? Baking is fun, and experimenting with these sweet breakfast pastries is a great way to keep things exciting. Since we already nailed the basic recipe for making those amazing Homemade Cinnamon Buns Recipe, we just need to swap out a couple of elements to change the whole flavor profile!
Here are a few little tricks I use when I want to give our favorite rolls a mini makeover without messing with the dough itself. These are simple swaps that deliver big impact!
- Swap the Glaze for Maple Goodness: If you’re tired of the cream cheese, ditch it for the morning! You can create an incredible maple glaze. Just whisk together 1 cup of powdered sugar, 1/4 cup of real maple syrup, and just enough milk (maybe 1-2 teaspoons) until it’s thin enough to drizzle but thick enough to look decadent. That maple hits the cinnamon so perfectly!
- Go Full Sticky Bun Mode: Want something truly decadent? Line your baking dish with a mixture before you place the raw rolls in for their second rise. This is the secret to warm sticky buns! Mix 1/2 cup of that brown sugar from the filling recipe, 1/4 cup of butter, and 1/2 cup of chopped pecans in a small saucepan. Gently warm it until the butter is melted and the sugar is dissolved—just a quick simmer. Pour this mixture evenly across the bottom of your greased pan before placing the rolls on top. When you flip them out, you get that crunchy, caramelized topping.
- A Touch of Citrus: This one is subtle but amazing! Add the zest of one full orange into your cinnamon-sugar filling mixture along with the two tablespoons of cinnamon. Orange and cinnamon are such a great pairing, adding brightness to an otherwise rich, comforting flavor. It also makes them smell utterly divine while they are baking!
Feel free to try these variations on your next batch! If you want to get fully chocolate-crazy, I also have a recipe for chocolate cinnamon rolls that uses a similar dough base if you ever need an extra dose of indulgence.
Frequently Asked Questions About Making Cinnamon Buns
It’s totally normal to have questions when you’re working with yeast dough, especially when trying to achieve that perfect result for your Weekend Brunch Baking Ideas. I’ve gotten so many great questions over the years about dough handling and storage, so I wanted to put my top three right here. Never hesitate—baking confidence comes from knowing exactly how to troubleshoot!
Can I use instant yeast instead of active dry yeast in this cinnamon buns recipe?
Oh, absolutely! You can definitely swap out the active dry yeast for instant yeast if that’s what you have in the pantry. Instant yeast is designed to be mixed right in with your flour, so you can skip that initial foamy activation step entirely. Just combine the instant yeast directly with your dry ingredients (the flour and salt) before you add the wet mixture. You might notice the dough rises just a tiny bit faster, but the final texture of these fluffy cinnamon rolls will be just as soft!
What is the best way to reheat leftover gooey cinnamon buns?
This is important because leftover cinnamon buns need a little reviving! If you’re reheating just a single roll, the microwave is your best friend, but you need a little steam. Place the roll on a plate, put a tiny splash of water (maybe a teaspoon!) next to it on the plate, and cover the whole thing loosely with a damp paper towel. Microwave it for about 15 to 20 seconds. That trapped steam brings all that moisture right back into the bread.
If you’re reheating a whole pan of rolls, I prefer the oven because it warms them through more evenly. Wrap the entire batch tightly in aluminum foil—this traps the steam—and warm them at 350°F for about 10 to 15 minutes. As soon as they are warm, you can unwrap them and add a fresh smear of frosting if you happen to have any leftover from making that amazing Best Cream Cheese Frosting Recipe we used!
If you ever need a totally hands-off approach to reheating, you could always look into slow cooker methods, though I find wrapping them works best for keeping that gooey center intact! Speaking of gooey, if you’re interested in making something else that requires similar care with heat control, check out my recipe for easy creamy mango sticky rice.
Serving Suggestions for These Comfort Food Baking Classics
Now that you’ve created the absolute best batch of cinnamon buns—soft, gooey, and dripping with that tangy, perfect glaze—you need the right supporting cast so everyone can truly enjoy these Comfort Food Baking classics! These rolls are rich, so a few simple pairings really help balance out the sweetness, especially if you’re serving them for a big weekend brunch or even as a special holiday morning treat.
First off, you absolutely must have excellent coffee. A strong, dark roast cuts through the richness of the cream cheese icing beautifully. No weak stuff allowed when you have rolls this good!
If you’ve got a crowd, balancing the sweet with something light and fresh is smart planning. A simple bowl of fresh mixed berries—strawberries, blueberries, maybe some sliced melon—adds a necessary little tartness and color to the plate. It helps everyone feel a little less guilty about having a second roll!
But if you’re looking to make it a truly epic breakfast spread, you need a savory anchor. I always pair mine with something salty and comforting, like my recipe for tall, flaky buttermilk biscuits served with good quality ham or bacon. The fat and salt from the side dish just amplify how sweet and buttery your rolls are. It’s the perfect combination that makes everyone happy!
Estimated Nutritional Data for One Serving of Cinnamon Buns
Okay, let’s talk fuel! I know these cinnamon buns are pure indulgence—they’re meant to be a treat, right? But because I developed this recipe grounded in solid food science from my nutrition background, I’ve gone ahead and calculated the estimated nutritional breakdown per serving for you. This helps give you a good idea of what you’re diving into when you grab one of these amazing rolls!
The figures below are based on the recipe yielding 12 servings, where each serving gets a generous amount of that delicious dough, filling, and that essential cream cheese frosting. This level of detail is just part of ensuring these are foolproof recipes you can trust!
- Serving Size: 1 bun
- Calories: 450
- Sugar: 45g
- Sodium: 350mg
- Fat: 22g
- Saturated Fat: 13g
- Unsaturated Fat: 9g
- Trans Fat: 0.5g
- Carbohydrates: 58g
- Fiber: 2g
- Protein: 7g
- Cholesterol: 55mg
Now, here’s my little disclaimer, because I always want you to be well-informed! These numbers are seriously just estimates based on the standard ingredients listed in the recipe. If you swap out the whole milk for skim, or if you go totally wild with a thick layer of frosting (which, honestly, who could blame you?), those numbers will shift a bit. For the most accurate data, you’d need to calculate based on the exact brands you use, but this gives you a fantastic, reliable starting point. If you’re looking for lighter options later in the week, I have some great inspiration over in my guide for healthy lunch ideas!
Share Your Ultimate Soft & Gooey Homemade Cinnamon Buns Experience
Honestly, seeing pictures of your bakes and hearing how much your family loved these rolls is the best part of my day! I put so much care into making sure this Homemade Cinnamon Buns Recipe is everything you dream of—all that softness, that gooey center, and that perfect cream cheese frosting. Now that you’ve conquered the yeast dough and baked up these beauties, I truly want to know how it went in your kitchen!
Did the dough feel springy during kneading? Were your rolls perfectly swirled? Did they disappear faster than mine usually do? Don’t be shy! Please leave a rating right here on the recipe card. If you can swing it, five stars lets me know I’ve successfully helped you make an amazing batch of bakery-style cinnamon rolls!
And please, please tag me on social media! I love seeing those photos of your spreads—whether it’s a snowy Christmas morning stack or just a Tuesday treat for yourself. Tagging me helps other home bakers see just how achievable these rolls are, and that builds huge confidence for our community.
If you ran into any trouble or have questions about substituting ingredients or adjusting the rise time, drop a comment below. I personally read every single message, and I’m always here to help troubleshoot or just cheer you on! If you ever want to chat more about recipe development or just say hello, my contact page is open.
PrintThe Ultimate Soft & Gooey Homemade Cinnamon Buns with Cream Cheese Frosting
Make bakery-style cinnamon rolls from scratch. This recipe delivers soft, fluffy, and irresistibly gooey cinnamon buns topped with a rich cream cheese glaze, perfect for weekend brunch or holiday mornings.
- Prep Time: 30 min
- Cook Time: 25 min
- Total Time: 2 hours 5 minutes
- Yield: 12 servings 1x
- Category: Breakfast Pastry
- Method: Baking
- Cuisine: American
- Diet: Vegetarian
Ingredients
- 1 cup whole milk, warmed to 110°F
- 2 1/4 teaspoons active dry yeast
- 1/2 cup granulated sugar, divided
- 1/4 cup unsalted butter, softened
- 1 large egg, room temperature
- 3 1/2 cups all-purpose flour, plus more for dusting
- 1 teaspoon salt
- 1/2 cup unsalted butter, softened (for filling)
- 1 cup packed light brown sugar (for filling)
- 2 tablespoons ground cinnamon (for filling)
- 1/2 cup cream cheese, softened (for frosting)
- 1/4 cup unsalted butter, softened (for frosting)
- 2 cups powdered sugar, sifted (for frosting)
- 1 teaspoon vanilla extract (for frosting)
- 1–2 tablespoons whole milk (for frosting)
Instructions
- Warm the milk until it reaches 110°F. Pour the milk into a large bowl and sprinkle the yeast and 1 teaspoon of the granulated sugar over the top. Let stand for 5 to 10 minutes until foamy.
- Add the remaining granulated sugar, softened butter, and egg to the yeast mixture. Mix until combined.
- In a separate bowl, whisk together the flour and salt. Gradually add the dry ingredients to the wet ingredients, mixing until a shaggy dough forms.
- Turn the dough out onto a lightly floured surface and knead for 6 to 8 minutes until the dough is smooth and elastic.
- Place the dough in a lightly oiled bowl, turning to coat. Cover the bowl with plastic wrap and let it rise in a warm place for 1 to 1.5 hours, or until doubled in size.
- While the dough rises, prepare the filling. In a small bowl, mix the 1/2 cup softened butter, brown sugar, and ground cinnamon until well combined and spreadable.
- Once the dough has risen, punch it down gently. Roll the dough out on a lightly floured surface into a 12×18 inch rectangle.
- Spread the cinnamon-sugar filling evenly over the entire surface of the dough, leaving a small border on one long edge.
- Starting from the long edge opposite the border, tightly roll the dough into a log. Pinch the seam closed.
- Using a sharp knife or unflavored dental floss, slice the log into 12 equal rolls.
- Arrange the rolls in a greased 9×13 inch baking dish. Cover the dish loosely and let the rolls rise again in a warm spot for 30 to 45 minutes, or until puffy.
- Preheat your oven to 375°F. Bake the cinnamon buns for 20 to 25 minutes, or until golden brown.
- While the buns bake, prepare the cream cheese frosting. Beat the softened cream cheese and butter together until smooth. Gradually add the powdered sugar and vanilla extract. Add milk one tablespoon at a time until you reach a smooth, spreadable consistency.
- Remove the buns from the oven and let them cool in the pan for 5 minutes. Spread the cream cheese frosting generously over the warm buns. Serve immediately.
Notes
- For overnight cinnamon buns, assemble the rolls in the pan, cover tightly with plastic wrap, and refrigerate for up to 12 hours before baking. Add 10 minutes to the baking time if baking directly from the refrigerator.
- If you prefer a thinner glaze, add more milk to the frosting mixture.
- Use room temperature ingredients for the dough to help the yeast activate properly and create a fluffy texture.
Nutrition
- Serving Size: 1 bun
- Calories: 450
- Sugar: 45g
- Sodium: 350mg
- Fat: 22g
- Saturated Fat: 13g
- Unsaturated Fat: 9g
- Trans Fat: 0.5g
- Carbohydrates: 58g
- Fiber: 2g
- Protein: 7g
- Cholesterol: 55mg